If your organisation is building multiple apps around common backend infrastructure and shared user interface elements, there are great ways to distribute that common code between apps, just like you would with third party dependencies.
Android Libraries
Since the introduction of Android Studio and the Gradle Plugin, libraries and their interdependencies became a lot easier in Android. The problem with sharing libraries in Android is that a lot of times it is not just Java classes, but also resources, an Android Manifest and other files that you want to distribute to app developers. To enable all this, Android Studio introduced the Android Archive (or AAR) file format, which basically is a ZIP archive containing all necessary files.
On top of that, to prevent duplicate classes in different JAR files, there is a need for dependency resolution.
Maven and Artifacts
Building on years of experience and battle-tested use of code repositories in the Java enterprise world, this finally brought Maven repositories to Android.
Maven repositories all have the same layout and a specific format for metadata, and therefore can be used in conjunction with a multitude of tools and in various combinations. There are many commercial providers and Android Studio comes pre-configured with several open source variants of these.
Each JAR or AAR file in a Maven repository is called an artifact and they can be grouped together. This is reflected in the familiar dependency configuration in the build.gradle files in your apps:
implementation 'com.example:my-awesome-library:1.0.0'Where the first part com.example is the groupId, and the second part my-awesome-library is the artifactId.
As an example, let's create a simple Android library with one class and a string resource. First, create a new, empty project:
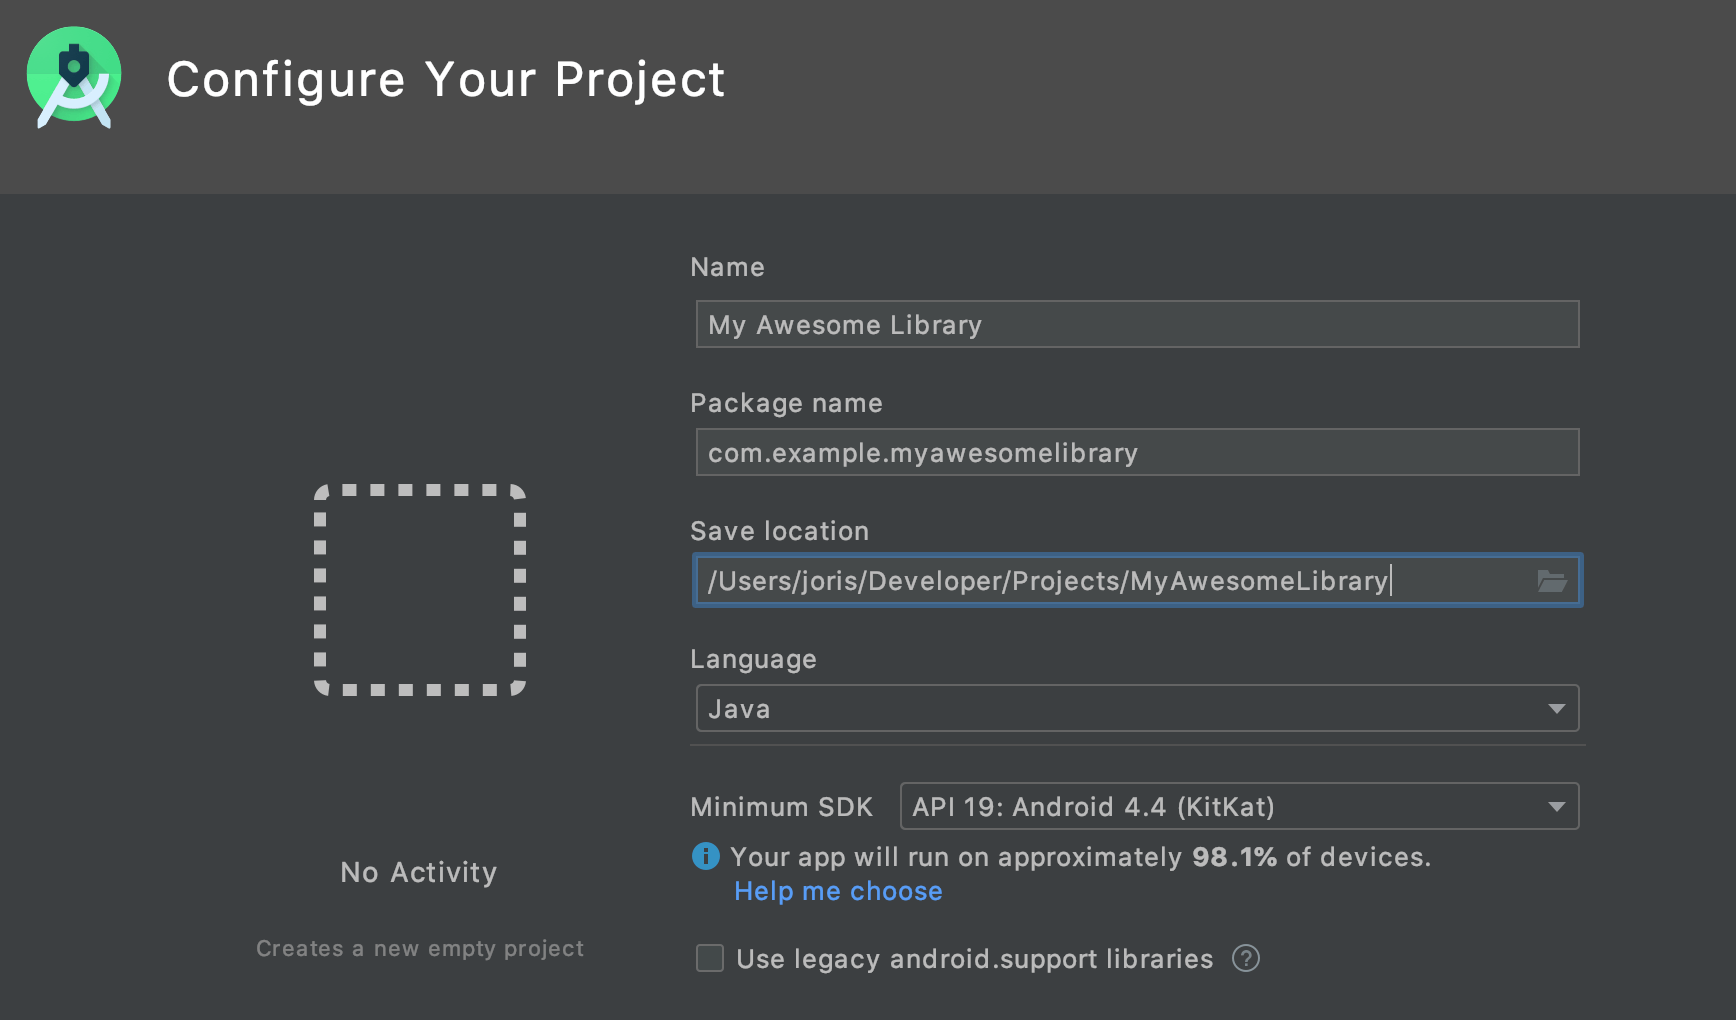
This will automatically add an App module, but we want to create a library. So create a new module:
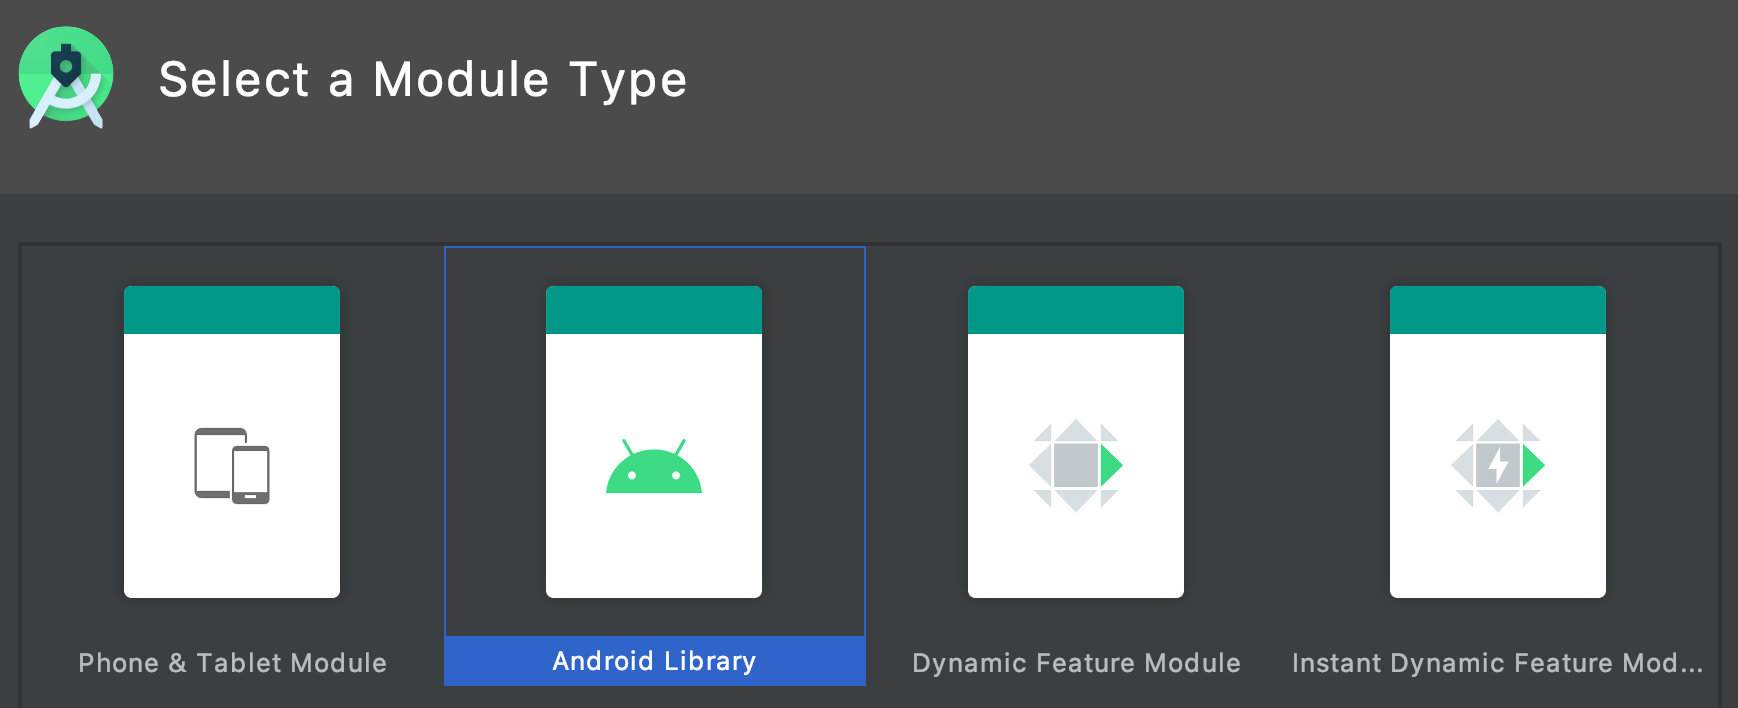
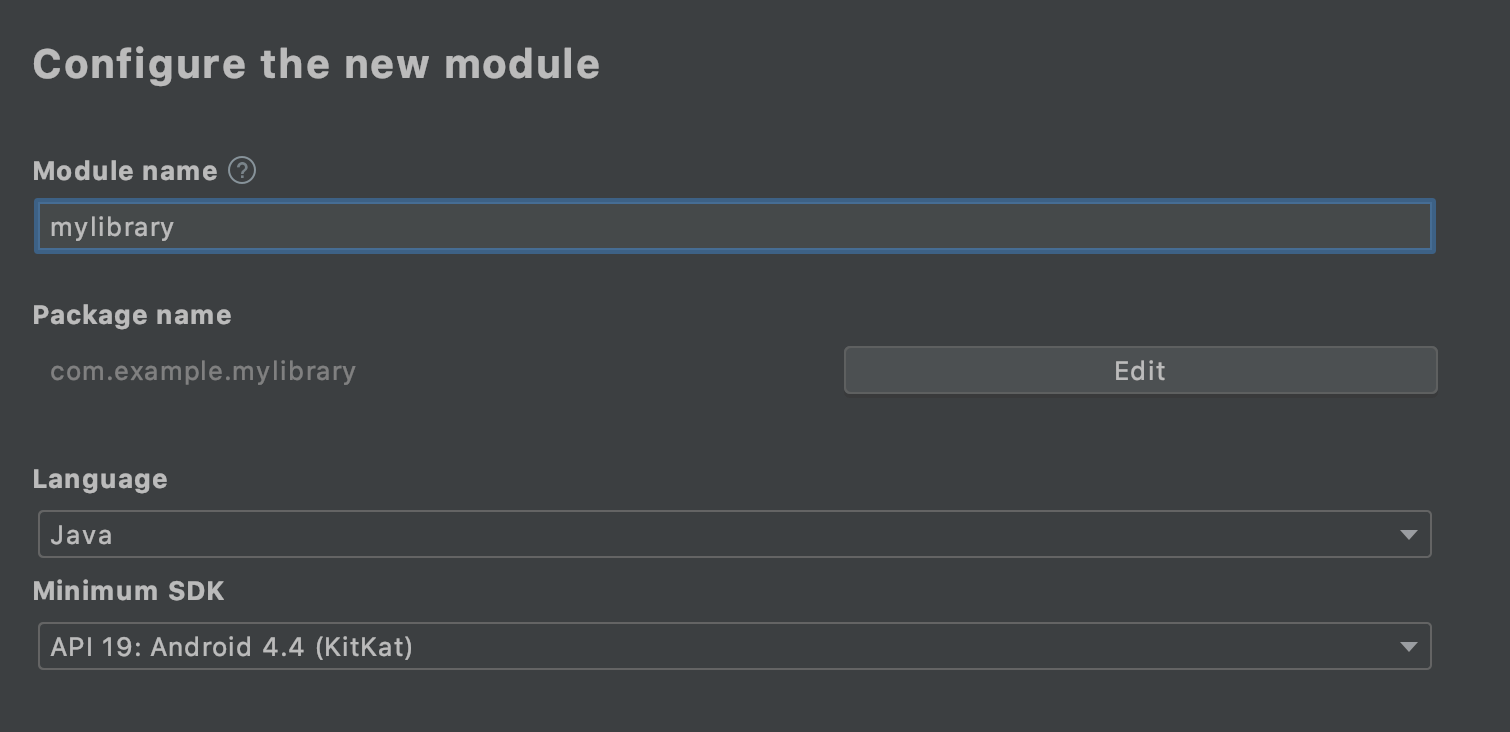
Then, let's add a string resource:
<?xml version="1.0" encoding="utf-8"?>
<resources>
    <string name="level">Awesome</string>
</resources>
And a simple class:
package com.example.mylibrary;

import android.content.Context;

public class MyAwesomeClass {

    private String mLevel;

    public MyAwesomeClass(Context context) {
        mLevel = context.getResources().getString(R.string.level);
    }
}
Use your existing code repository
The quickest and easiest way to share these modules is by exposing your Maven repository as you would do for a normal code repository, for example in GitHub. That way, a publication of your artifacts are done in a local folder, after which you commit the changes and push them to your favorite code repository. This is also a great way to keep the artifacts private within your organization.
Start by adding the maven-publish plugin to your Gradle config:
apply plugin: 'com.android.library'
apply plugin: 'maven-publish'
And define the publish details of the artifact:
afterEvaluate { // <-- needed because only here components are available
    publishing {
        publications {
            release(MavenPublication) {
                from components.release
                groupId 'com.example'
                artifactId 'my-awesome-library'
                version '1.0.0'
            }
        }
    }
}
To publish to your GitHub local checkout, add it as a repository in your Gradle file:
afterEvaluate {
    publishing {
        publications {
            // ... see above
        }

        repositories {
            maven {
                name 'GitHub'
                url "file://my/local/checkout/releases"
            }
        }
    }
}
In the example above, we've added a specific folder releases to be sure we can also add snapshots and beta releases without interfering with mainline version numbers. Of course, this is up to you.
Now, Gradle will have generated some new tasks for you:
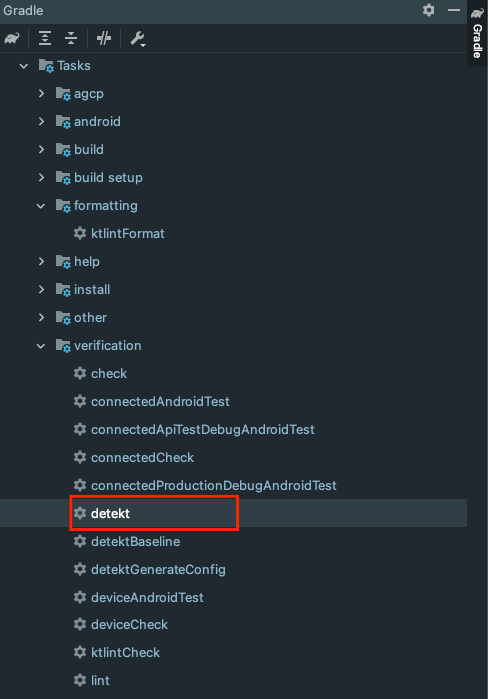
And when you run publishAllPublicationsToGitHubRepository, you will see there is now a folder in your local repository path:
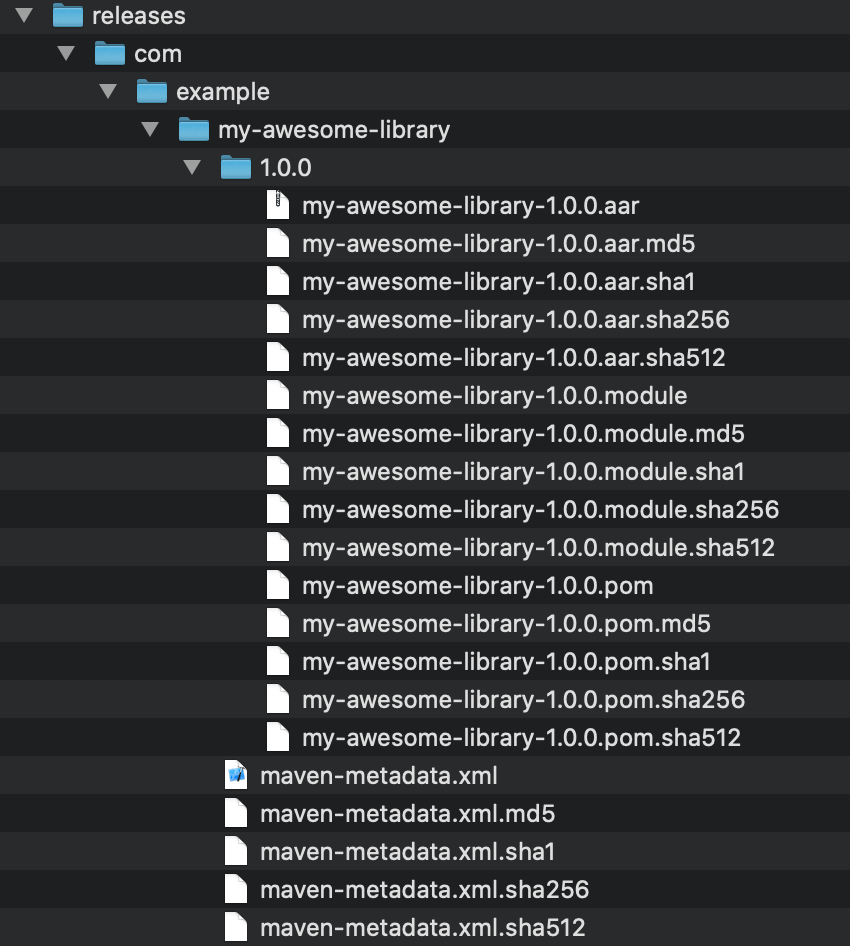
So if you would now push this to your GitHub repository, you can use the URL as a repository in all of your Android projects:
repositories {
    jcenter()
    google()
    maven {
        url "https://github.com/Example/my-awesome-library/raw/master/releases"
    }
}

dependencies {
    implementation 'com.example:my-awesome-library:1.0.0'
}
Use S3 and CDN
If you want to share your artifacts to the world, but want to keep distribution in your own hands (e.g. because your code is not Open Source), you can publish your artifacts to Amazon S3 directly from Android Studio.
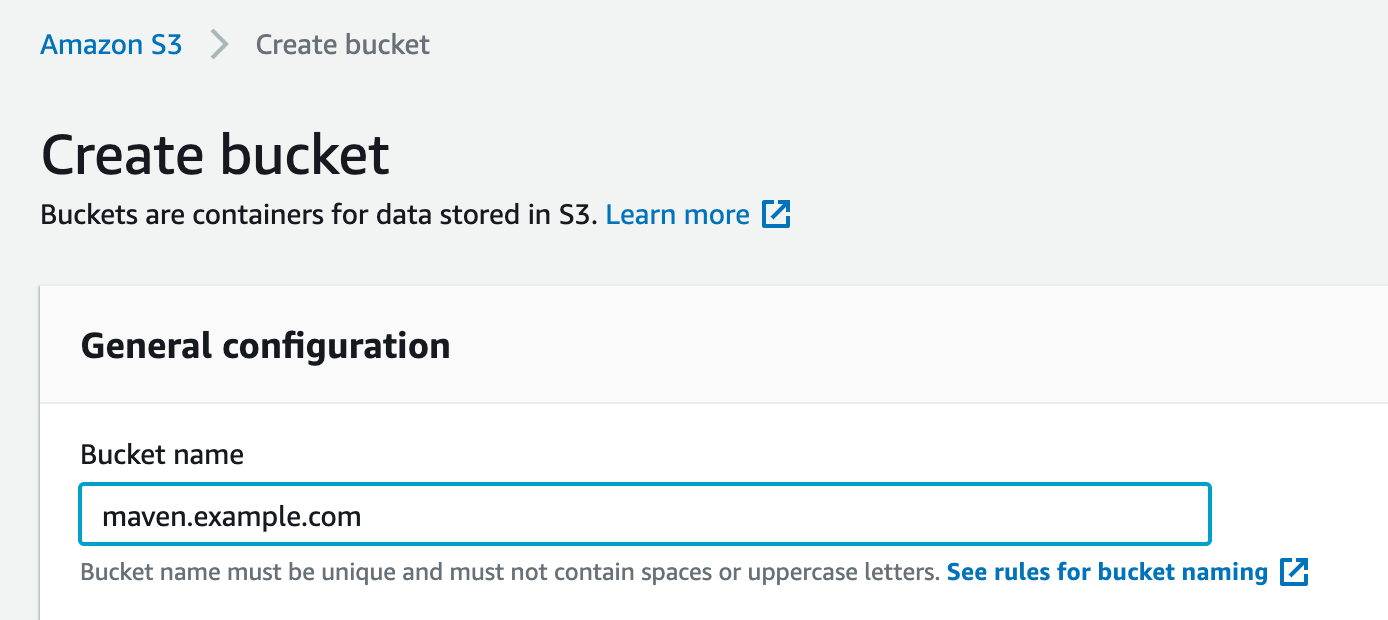
Start by creating an S3 bucket in AWS (and make sure you have permissions to upload to the bucket):
Add a CloudFront distribution to it:
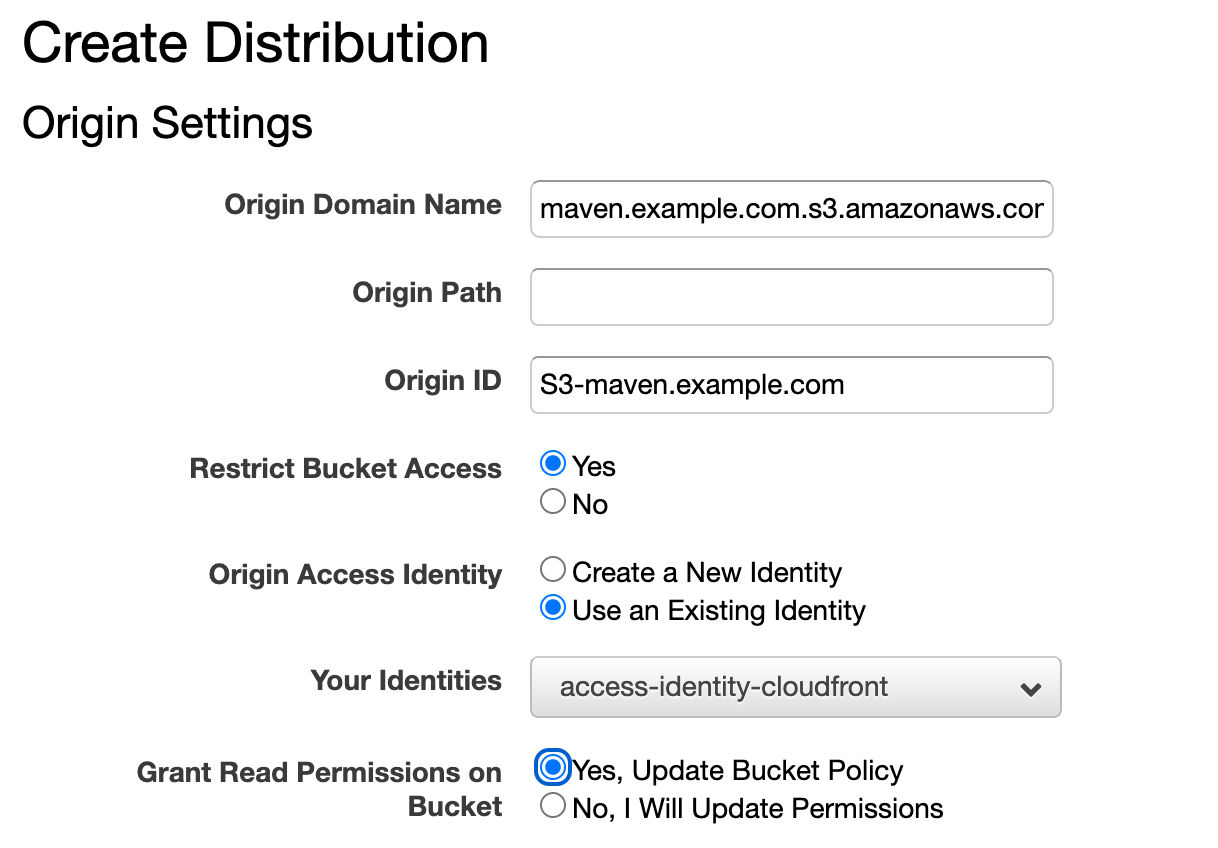
And make sure you have your Maven URL DNS hostname pointed to it (in this example, maven.example.com). Then, add the S3 bucket as a repository in your library's Gradle config:
        repositories {
            maven {
                name 'S3'
                url "s3://maven.example.com/releases"
                credentials(AwsCredentials) {
                    accessKey System.env.AWS_ACCESS_KEY_ID ?: findProperty('aws_access_key_id')
                    secretKey System.env.AWS_SECRET_ACCESS_KEY ?: findProperty('aws_secret_access_key')
                }
            }
        }
This way you can add your AWS keys to gradle.properties (or supply them as environment variables when run from the command line):
android.useAndroidX=true
android.enableJetifier=true

aws_access_key_id=xxxxxx
aws_secret_access_key=yyyyyyy
Now, there will be a new Gradle task publishAllPublicationsToS3Repository. When you run it, your artifacts will be uploaded to S3, after which they can be used in other projects as follows:
repositories {
    jcenter()
    google()
    maven {
        url "https://maven.example.com/releases"
    }
}

dependencies {
    implementation 'com.example:my-awesome-library:1.0.0'
}
Public Repositories
If your code is Open-Source and you want to minimize changes to developers' Gradle configuration, you can opt to publish your artifacts to a public repository like Bintray/jCenter, which is pre-configured in Android Studio. The basic steps taken above are the same, you just add the Bintray plugin and configure it in your libraries Gradle file:
apply plugin: 'com.jfrog.bintray'

bintray {
    user = System.env.BINTRAY_USER ?: findProperty('bintrayUser')
    key = System.env.BINTRAY_KEY ?: findProperty('bintrayKey')

    pkg {
        repo = 'releases'
        name = 'my-awesome-library'
        desc = 'My Awesome Library'
        websiteUrl = 'https://github.com/example/my-awesome-library'
        vcsUrl = 'https://github.com/example/my-awesome-library.git'
        licenses = ["Apache-2.0"]
        publish = true
        publicDownloadNumbers = true
        version {
            name = '1.0.0'
        }
    }
}
Transitive Dependencies
The maven-publish plugin follows your transitive dependencies as it would with linked projects in Android Studio.
This means that api dependencies will be declared transitive to any consumer of your app and implementation declarations will have to be provided for by the client project. In other words, if your library uses:
implementation 'androidx.appcompat:appcompat:1.1.0'Then any project depending on your library will have to provide the appcompat dependency by itself. If it's declared as:
api 'androidx.appcompat:appcompat:1.1.0'Then any project depending on your library will automatically depend on appcompat.
Conclusion
Sharing your code between projects while keeping full control over dependencies and versions is easy with Maven publishing, straight from Android Studio. If you have any questions, corrections or simply just want to drop us a line, we are, as always, available via our Support Channel.


