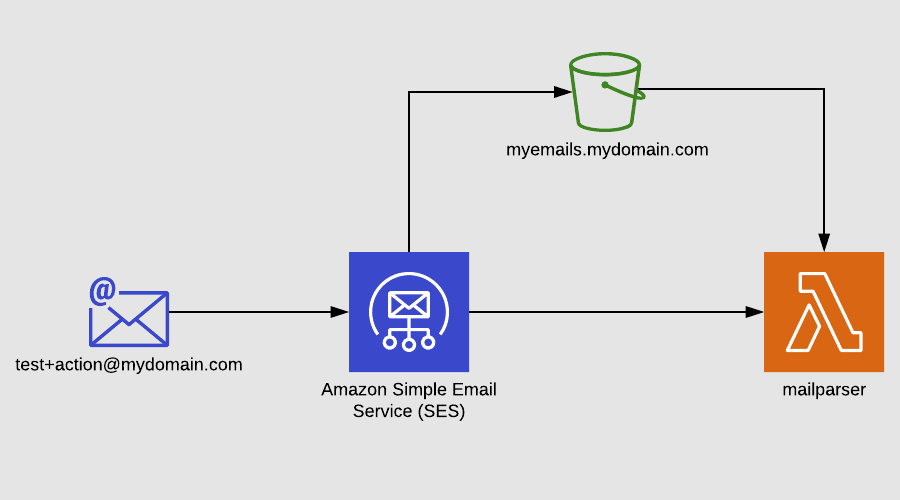
REST APIs and Webhooks are abundant in today's technology stacks. But what if email is your only way to signal certain events? Could you somehow turn these into Webhooks too?
Email parsing
There are several ways to use email to transmit event information. The data could be embedded in the email's metadata, such as address, mail headers or subject. Or it could be sent as a payload inside the email content. Until recently however, you would need to set up an email server to handle incoming email and configure some form of integration on that server to get hold of the emails so you can parse them.
With the advent of managed services and serverless computing, there are now several cloud-based solutions that handle most of the low-level details for you so you can focus on the actual parsing of the messages.
In this blog post, we will show you an example of how to use Amazon Simple Email Service hooked up to a Lambda function to do the parsing for you. The example will use both the incoming email address as well as the content to turn the messages into a payload to send as a Webhook.
Create an S3 bucket to store incoming emails
First of all, to be able to parse the email content, you need to temporarily store the emails before parsing them. For that, let's create an S3 bucket.
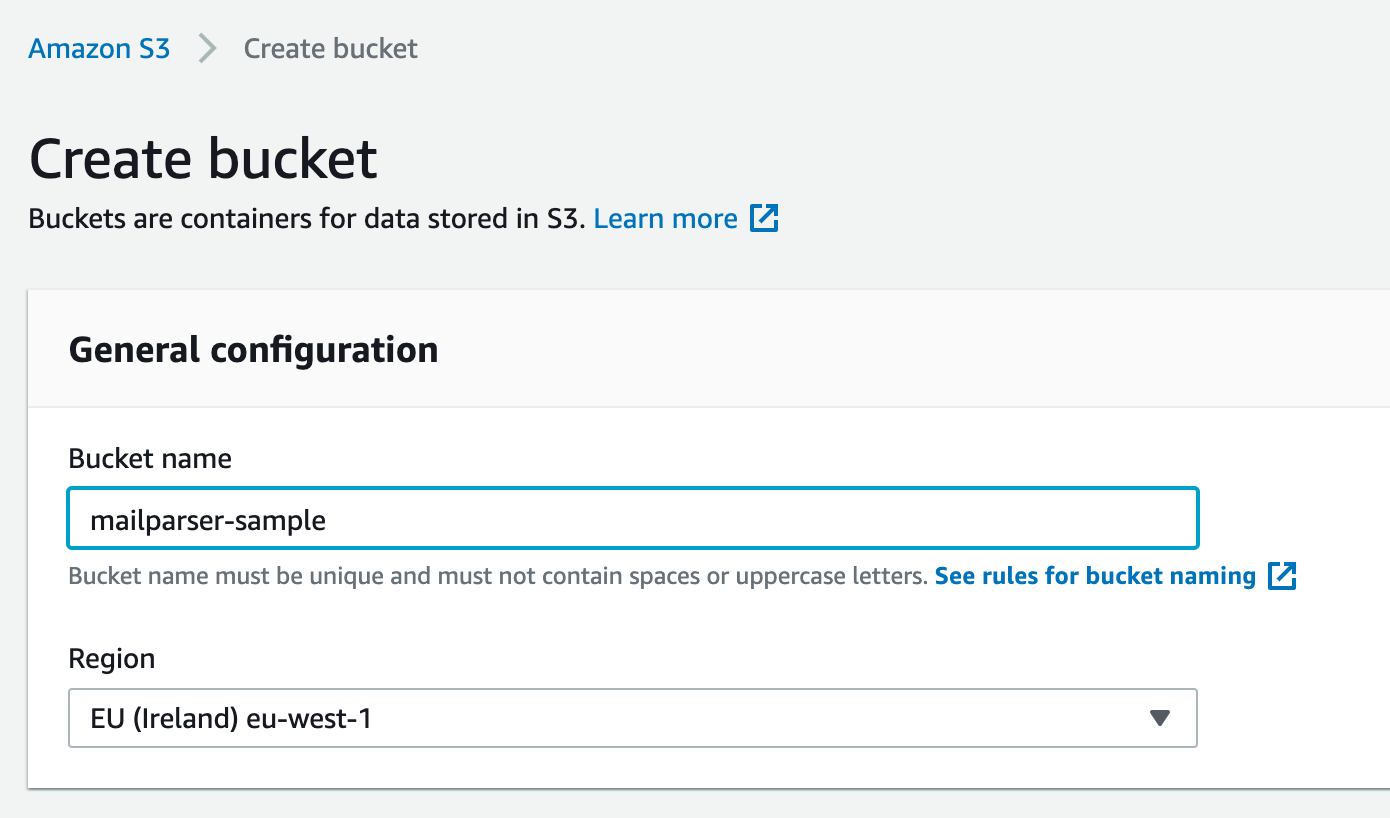
Make sure the bucket is accessible to SES by adding a bucket policy:
{
    "Version": "2012-10-17",
    "Statement": [
        {
            "Sid": "AllowSESPuts",
            "Effect": "Allow",
            "Principal": {
                "Service": "ses.amazonaws.com"
            },
            "Action": "s3:PutObject",
            "Resource": "arn:aws:s3:::BUCKET-NAME/*",
            "Condition": {
                "StringEquals": {
                    "aws:Referer": "AWSACCOUNTID"
                }
            }
        }
    ]
}
Where BUCKET-NAME is the name of the bucket (e.g., mailparser-sample) and AWSACCOUNTID is your AWS account ID.
Set up a Lambda application
The easiest way to create and deploy your Lambda function is to set up a Serverless Repo Application template and use the AWS SAM CLI tool to build and package your application. Installing and setup is beyond the scope of this blog post, see the AWS Docs for detailed instructions.
After the tools are installed, create a new project folder with a template.yaml file:
AWSTemplateFormatVersion: '2010-09-09'
Transform: 'AWS::Serverless-2016-10-31'
Description: >-
  Handle incoming SES email, parse for Notificare Push token and send to Push API.
Metadata:
  AWS::ServerlessRepo::Application:
    Name: mailparser-sample
    Description: Mailparser Sample
    Author: Notificare
    ReadmeUrl: Readme.md
    SemanticVersion: 1.0.0
    SourceCodeUrl: https://github.com/Notificare/mailparser-sample
Parameters:
  MailBucket:
    Type: String
    Default: mailparser-sample
  ApiBaseUrl:
    Type: String
    Default: https://myapi.example.com
Resources:
  Mailparser:
    Type: 'AWS::Serverless::Function'
    Properties:
      Policies:
        - S3CrudPolicy:
            BucketName: !Ref MailBucket
      Handler: index.handler
      Runtime: nodejs12.x
      CodeUri: .
      Description: >-
        Handle incoming SES email, parse for token and send to API.
      MemorySize: 128
      Timeout: 10
      Environment:
        Variables:
          API_BASE_URL: !Ref ApiBaseUrl
          TIMEOUT: 5000
          S3_BUCKET: !Ref MailBucket
Of course URLs and names of the bucket have to be adapted to your specific needs.
Also create your Lambda handler in index.js:
const AWS = require('aws-sdk')
const { simpleParser } = require('mailparser')
const axios = require('axios')
const s3client = new AWS.S3({ apiVersion: '2006-03-01', region: 'eu-west-1' })
const apiBaseUrl = process.env.API_BASE_URL || 'https://myapi.example.com/webhook'
const timeout = parseInt(process.env.TIMEOUT) || 10000
const s3bucket = process.env.S3_BUCKET || 'mailparser-sample'

/**
 * @param {Object} event - API Gateway Lambda Proxy Input Format
 */
exports.handler = async (event) => {

  const sesNotification = event.Records[0].ses
  const messageId = sesNotification.mail.messageId
  const receipt = sesNotification.receipt

  if (receipt.spfVerdict && receipt.spfVerdict.status === 'FAIL') {
    console.warn('email fails SPF checks')
  } else if (receipt.dkimVerdict && receipt.dkimVerdict.status === 'FAIL') {
    console.warn('email fails DKIM checks')
  } else if (receipt.spamVerdict && receipt.spamVerdict.status === 'FAIL') {
    console.warn('email considered SPAM')
  } else if (receipt.virusVerdict && receipt.virusVerdict.status === 'FAIL') {
    console.warn('email considered VIRUS')
  } else if (receipt.dmarcVerdict && receipt.dmarcVerdict.status === 'FAIL' && receipt.dmarcPolicy && receipt.dmarcPolicy.status === 'REJECT') {
    console.warn('email rejected because of DMARC checks')
  } else if (!messageId) {
    console.warn('no messageId')
  } else {
    // Read the email content from S3
    const s3request = s3client.getObject({
      Bucket: s3bucket,
      Key: messageId
    })
    const stream = s3request.createReadStream()
    try {
      // Parse the email
      const parsed = await simpleParser(stream)
      if (!sesNotification.mail.destination || !sesNotification.mail.destination[0]) {
        console.warn('missing destination')
      } else if (!parsed.from || !parsed.from.value || !parsed.from.value[0]) {
        console.warn('missing sender')
      } else {
        // Use the second part of the email address as a qualifier, e.g., xxx+test@myapi.example.com will use 'xxx' as token, and 'test' as qualifier
        const addressParts = sesNotification.mail.destination[0].split('@')
        const splitAddress = addressParts[0].split('+')
        let qualifier = 'default';
        if (splitAddress[1]) {
          qualifier = splitAddress[1]
        }

        // Post the webhook with the parsed data
        await axios.post(apiBaseUrl, {
          message: parsed.subject || 'no message',
          token: splitAddress[0],
          qualifier: qualifier
        }, {
          timeout: timeout
        })
      }
    } catch (err) {
      console.warn(err.message)
    } finally {
      // Delete the mail from S3
      await s3client.deleteObject({
        Bucket: s3bucket,
        Key: messageId
      }).promise()
    }
  }
}
This Lambda function does 3 things:
- It fetches the mail content from S3
- It parses headers from the message
- It builds a payload to send the Webhook
This is just a simple example but as you can see by only using email addresses and extensions, you can already create a complete schema of triggered actions.
Now package the application and deploy it to your S3 bucket where you want to store the packaged artifact:
sam package \
    --template-file template.yaml \
    --output-template-file packaged.yaml \
    --s3-bucket myartifacts-bucket
And deploy the application so it can be invoked by SES:
sam publish --template packaged.yaml --region eu-west-1Now your application is published in the Serverless Application Repository:
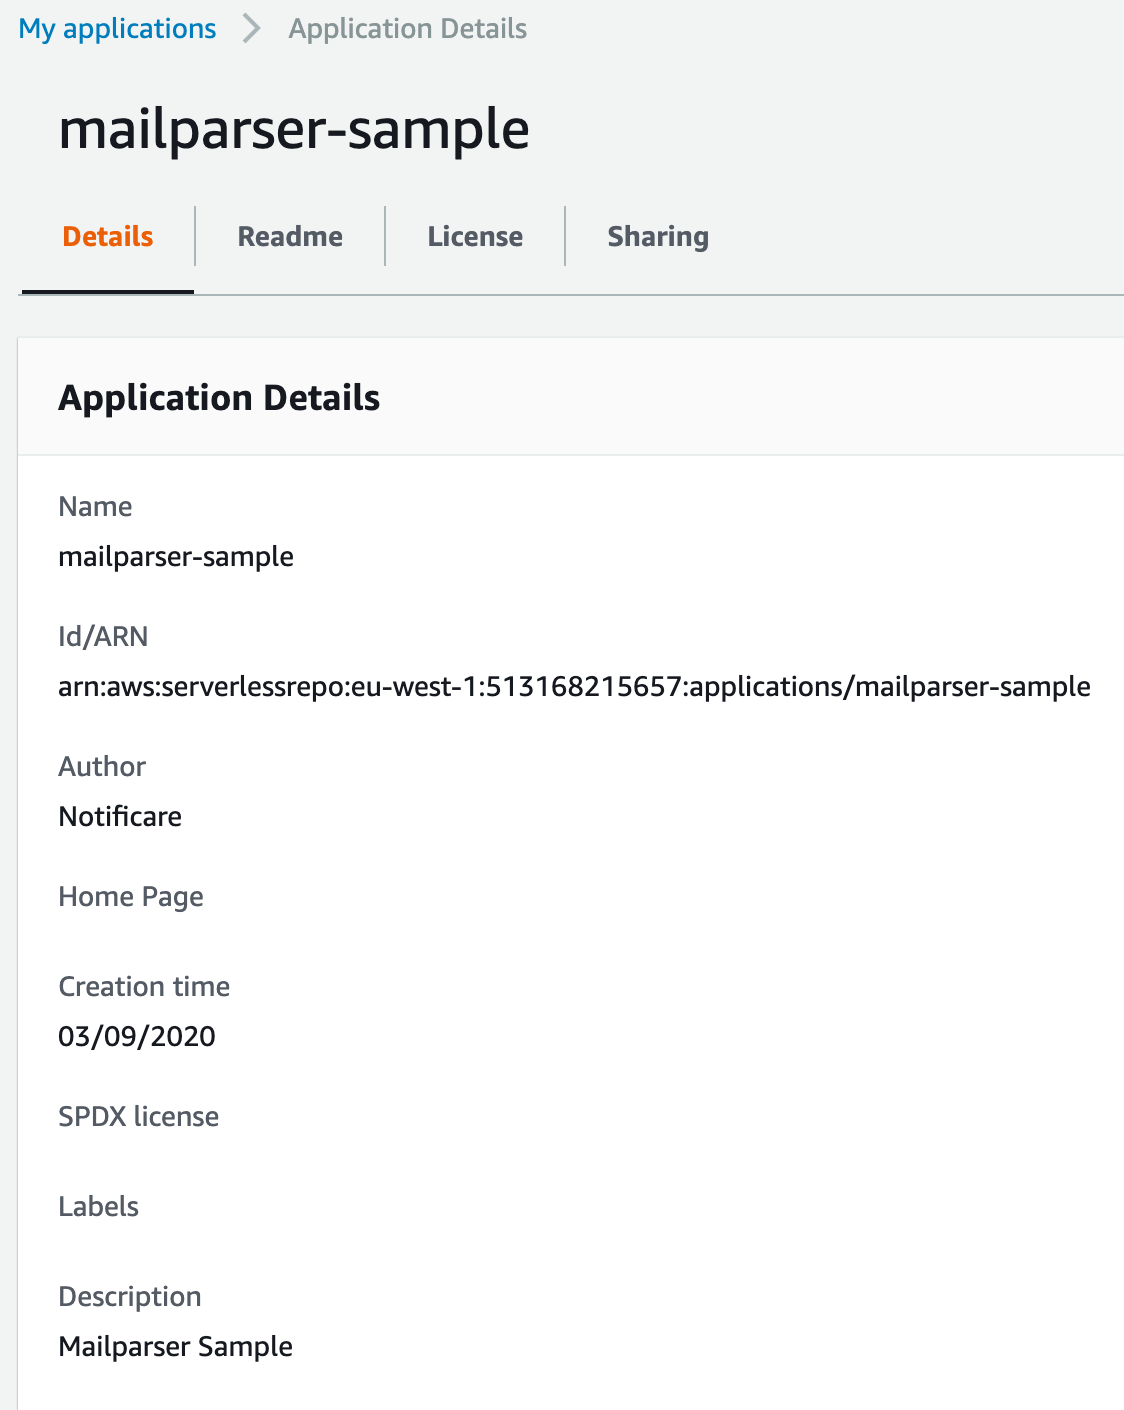
Now in Lambda, create a new Function and select Browse Serverless App Repository:
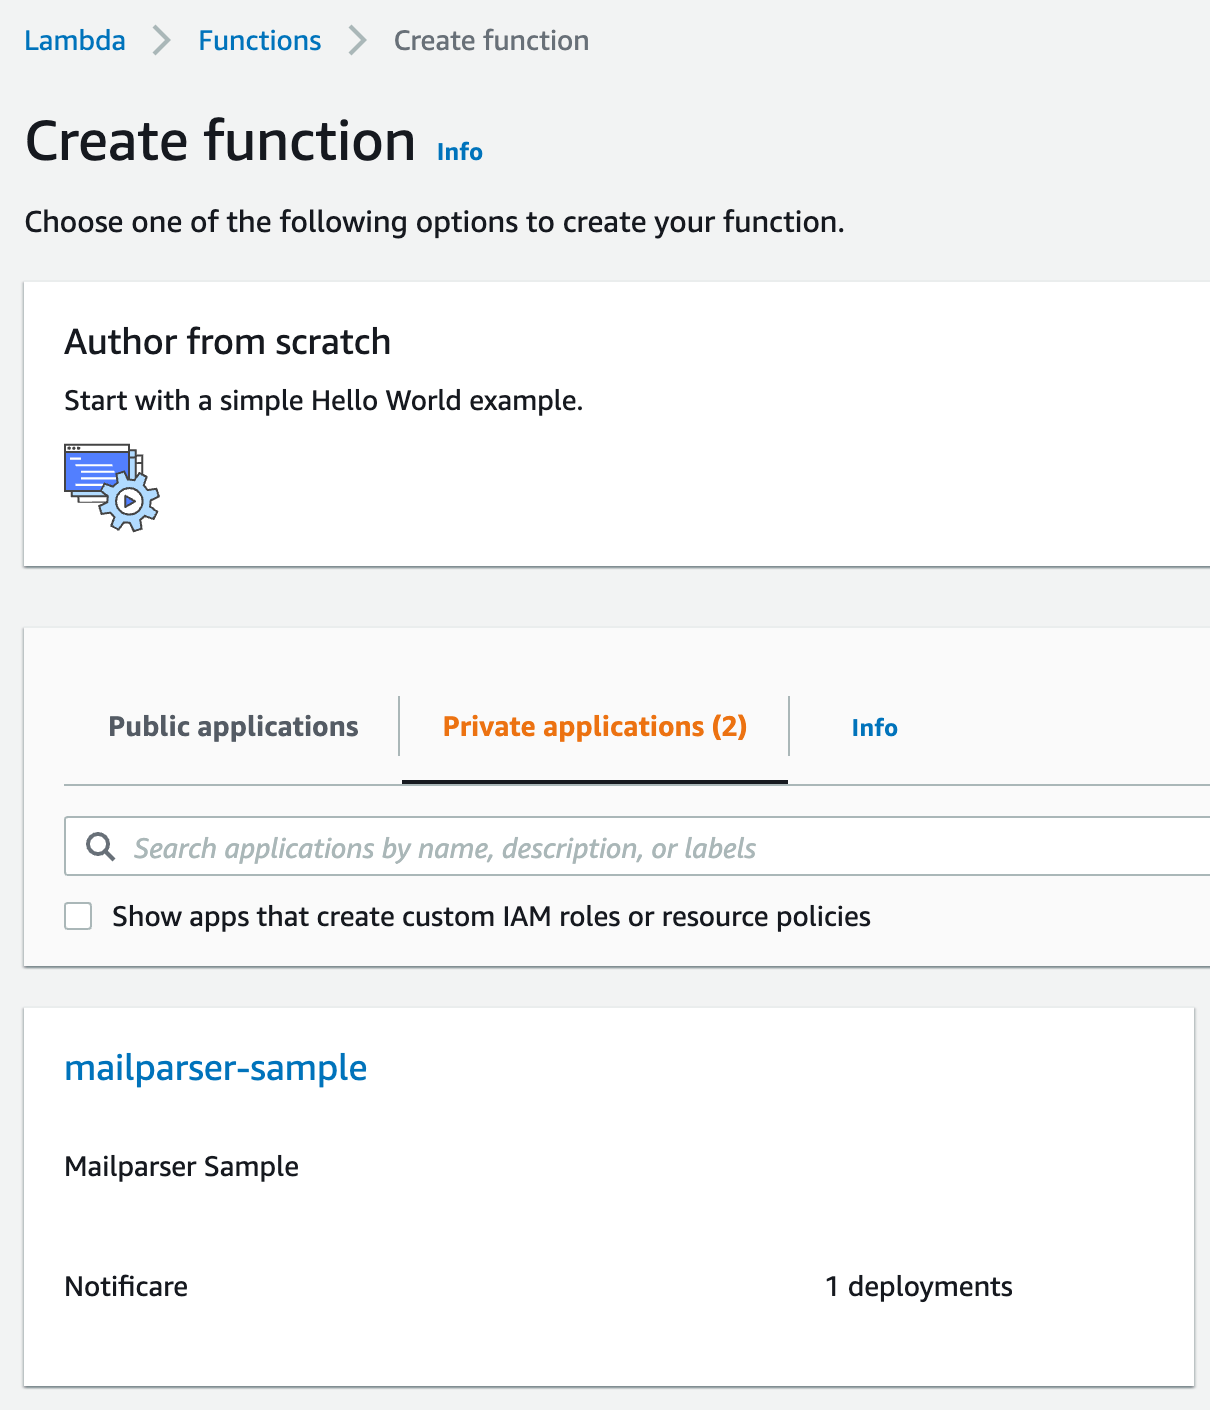
Select your application created before (e.g., mailparser-sample).
The settings that are generated by default from the template should be good to go, but you might want to make a last-minute change:
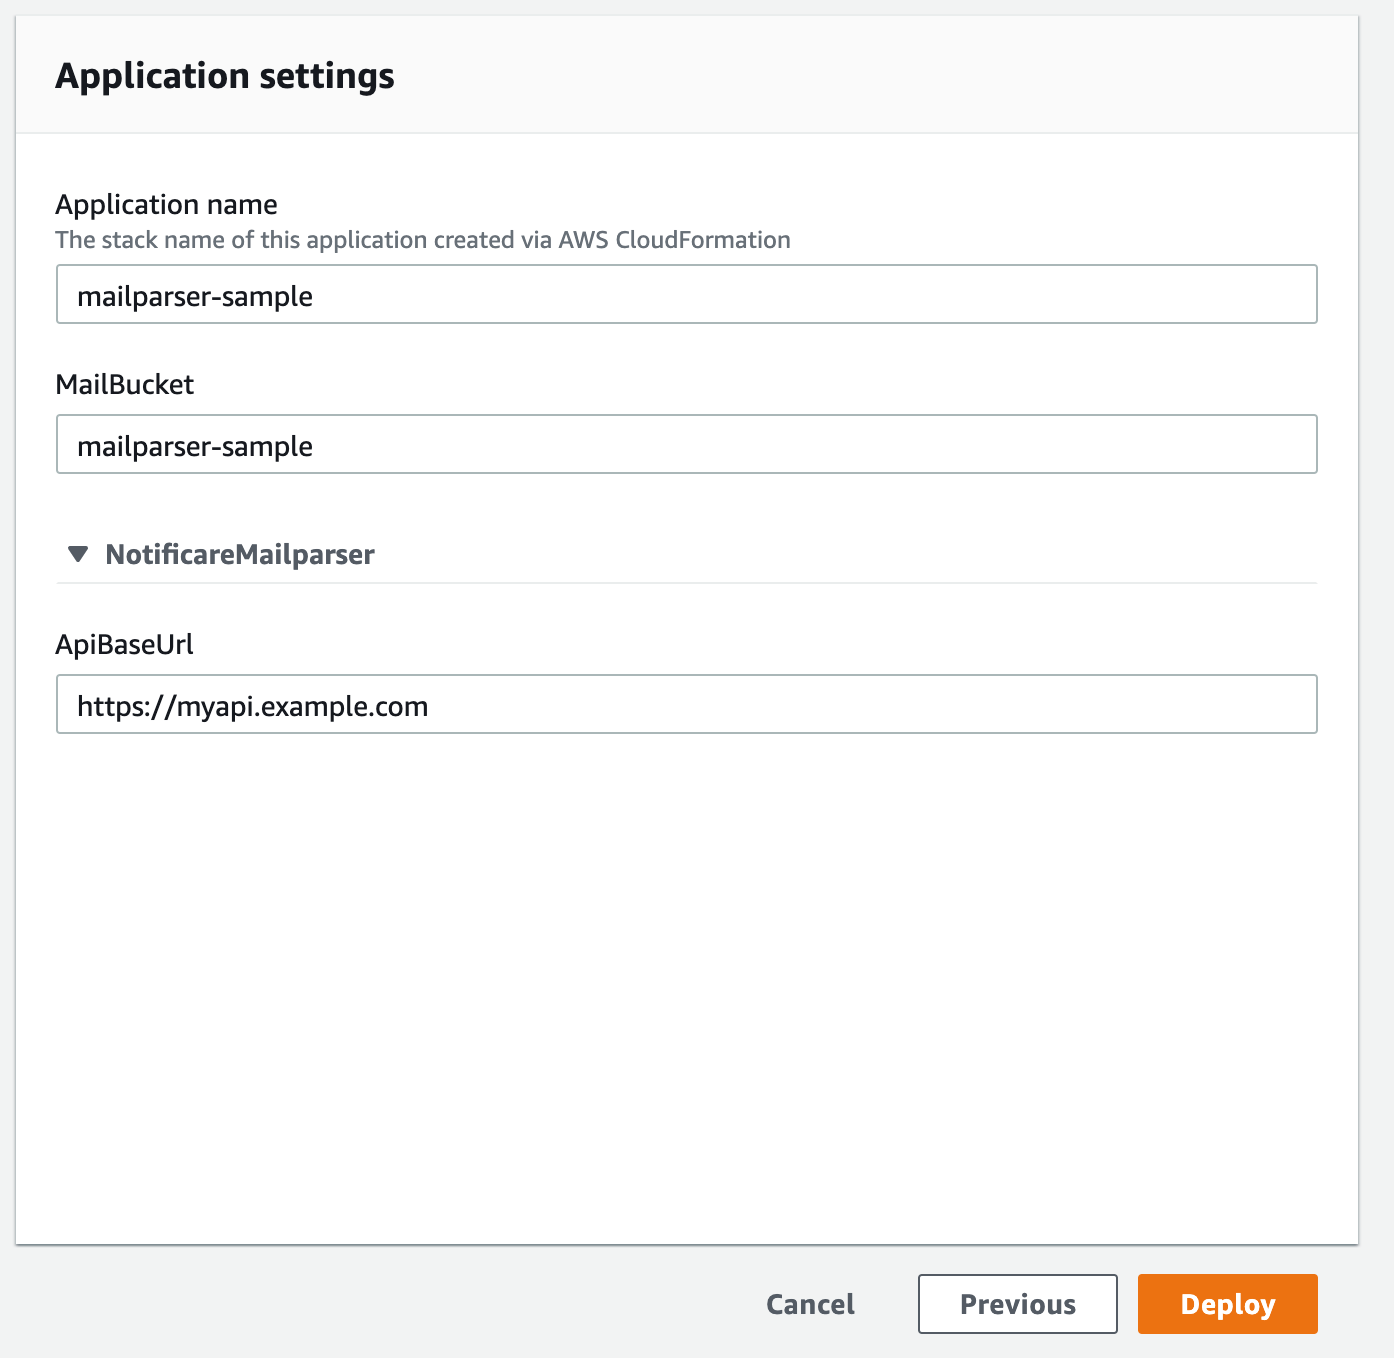
If everything is correct, click Deploy.
After your function is created, use the AWS CLI to set permission for SES to invoke your function:
aws lambda add-permission \
    --function-name serverlessrepo-mailparser-sam-Mailparser-XXXXXXXX \
    --action lambda:InvokeFunction \
    --statement-id ses \
    --principal ses.amazonaws.com \
    --source-account AWSACCOUNTID \
    --output text
Where the function name is of course the name of the generated Lambda function and AWSACCOUNTID is again your account id.
Configure SES for incoming email
Now, to connect the dots, let's configure SES to store messages in our S3 bucket and tell Lambda to process the incoming messages.
In SES, go to Email Receiving and add a new rule set.
In the Rule Set, add a new rule:

And map it to your desired email domain (e.g., myapi.example.com):
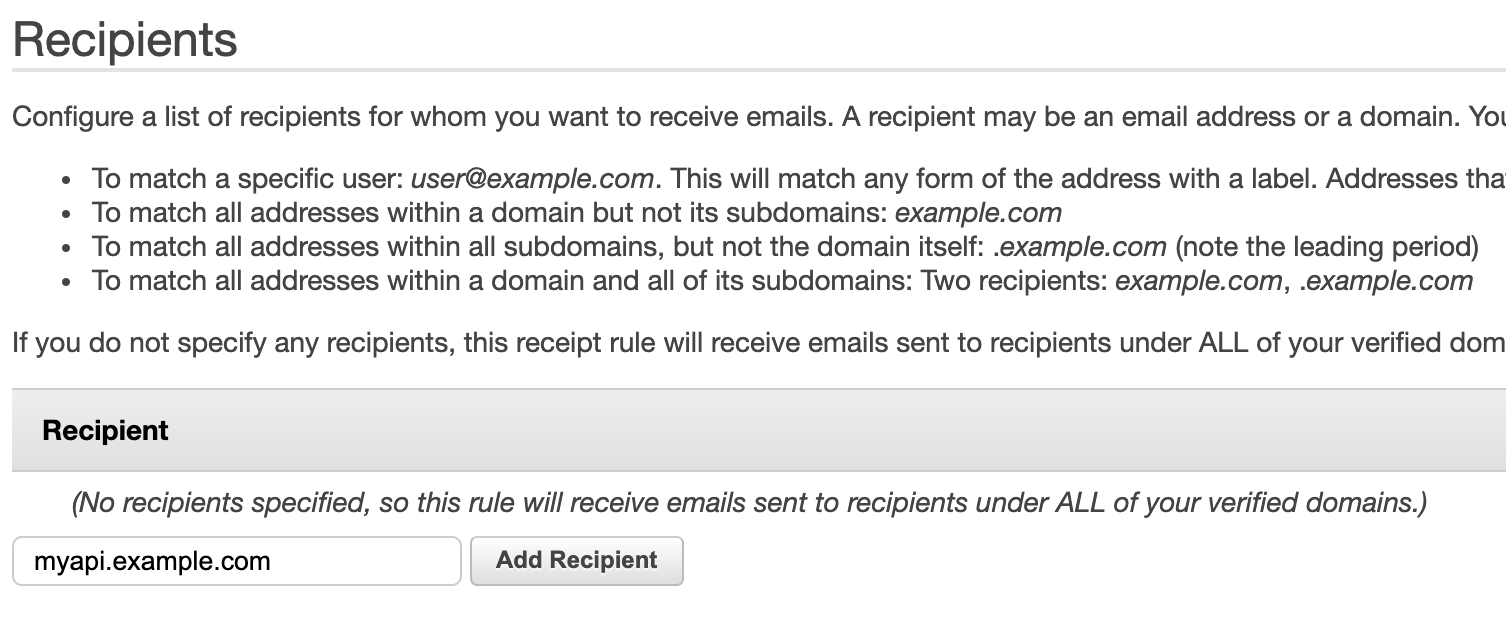
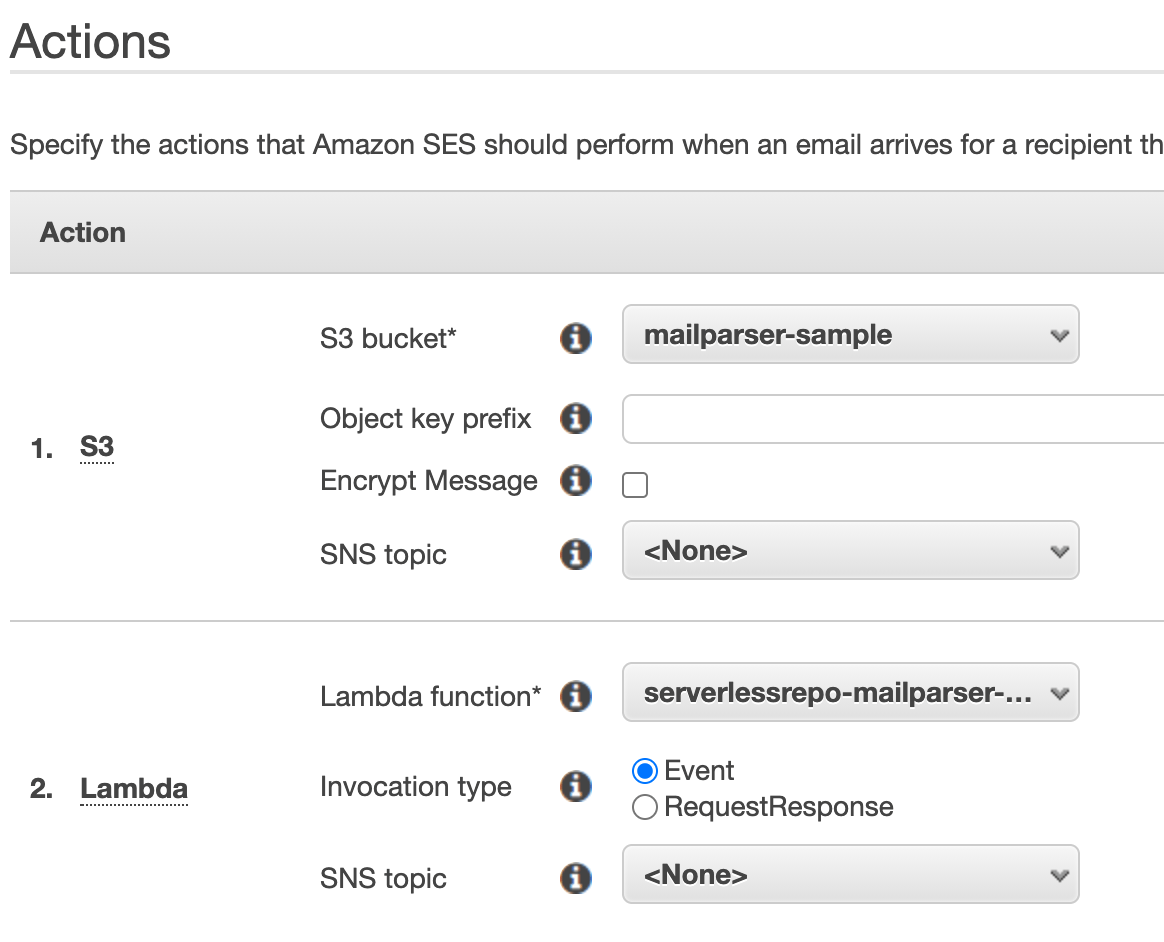
Now start adding the actions to your incoming email rule. First, store the emails in S3. After that, invoke your Lambda function to parse the email:
Now name your rule and enable it:
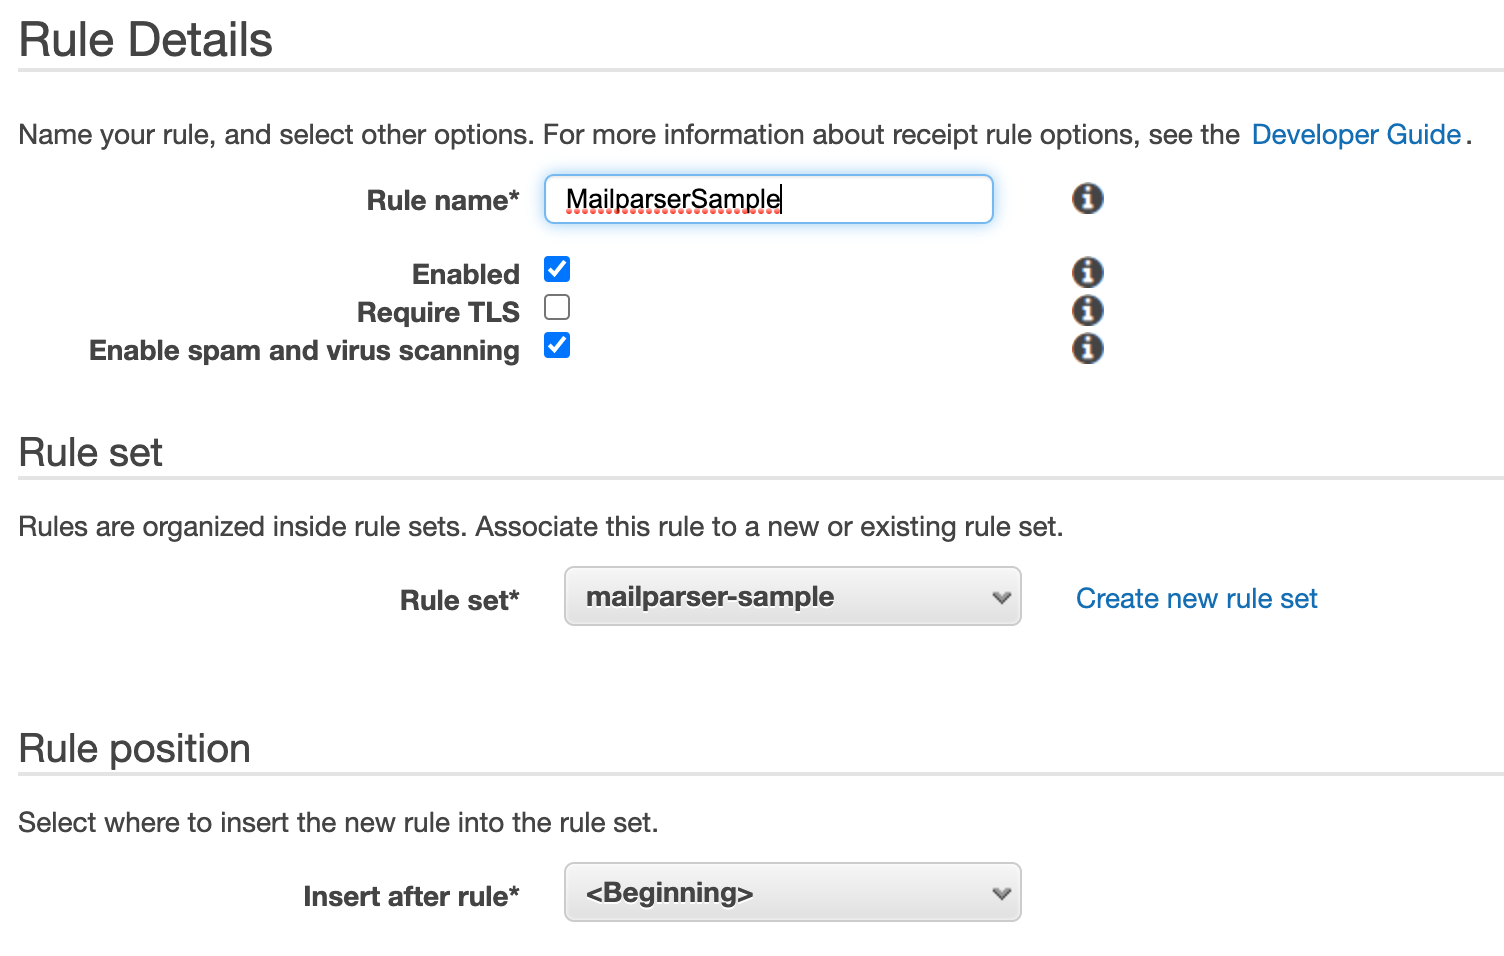
Finally, to make sure mail to your domain actually ends up in SES, verify your domain and set mail delivery DNS records to point to SES:
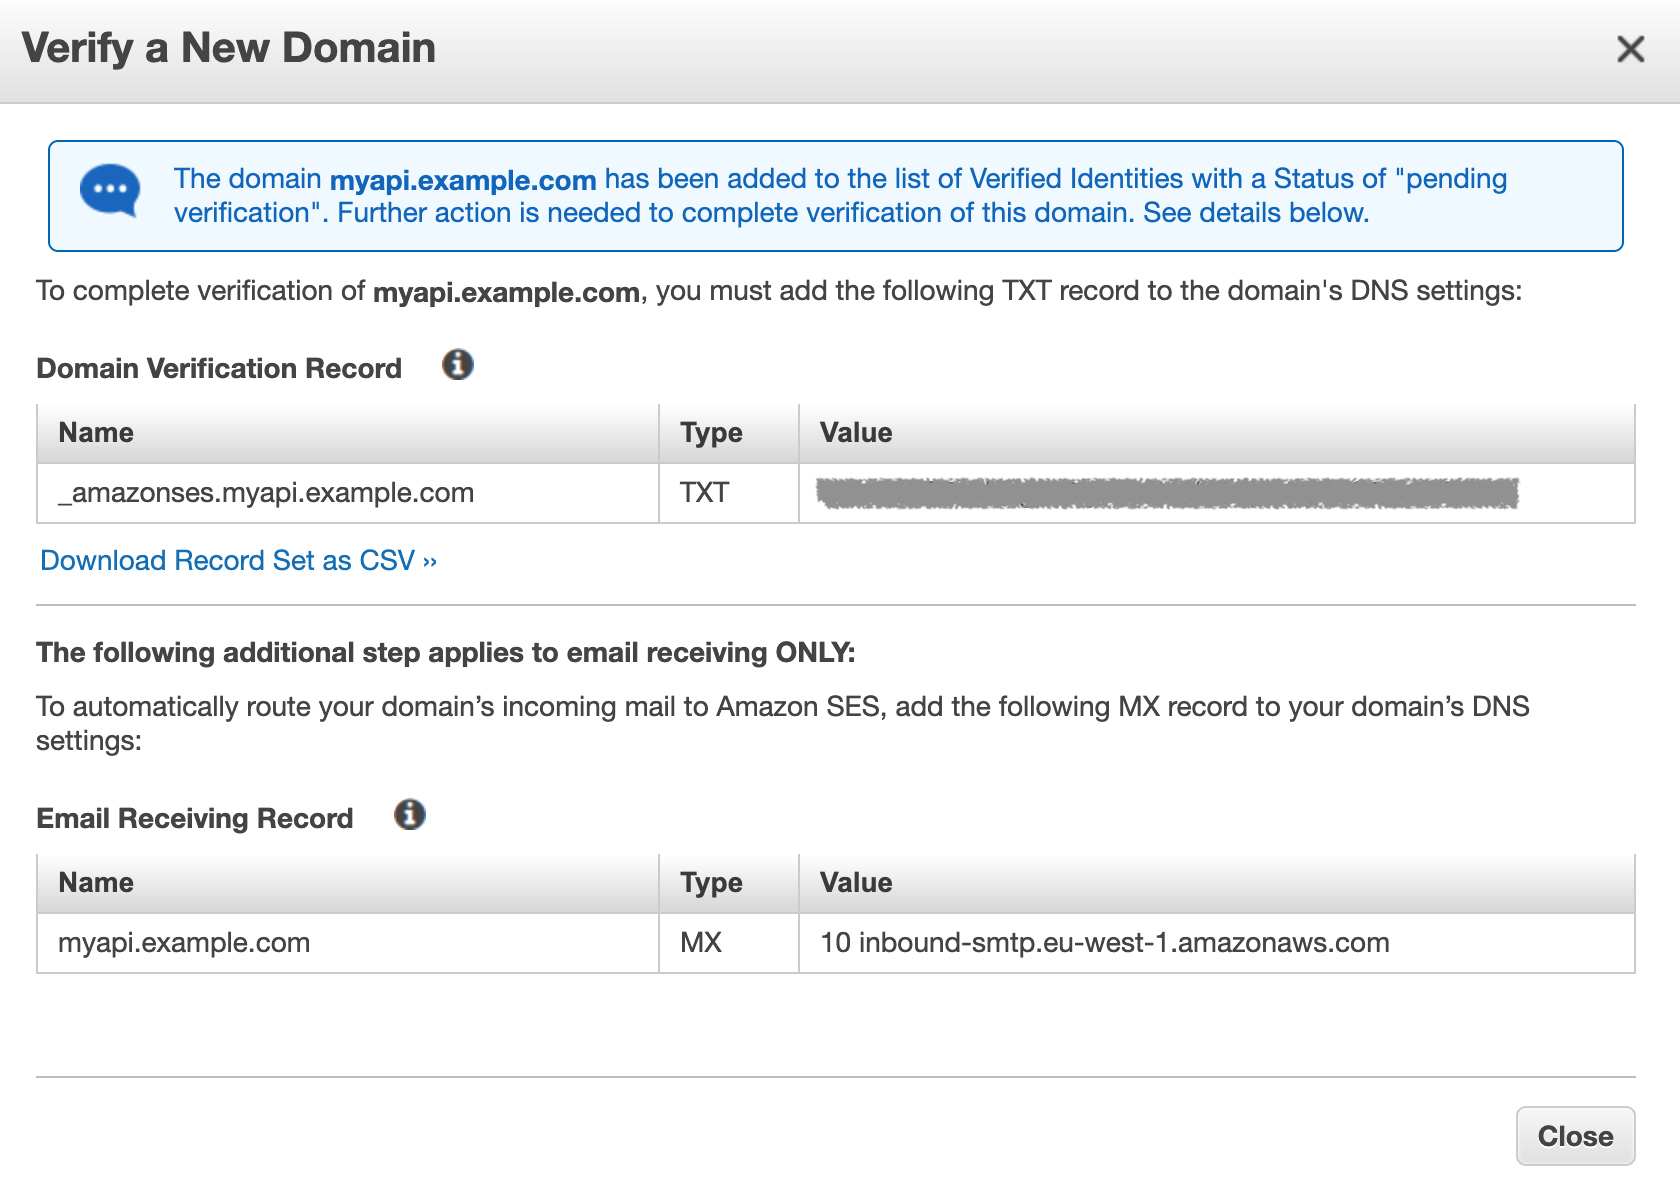
After DNS is propagated, any email sent to your subdomain will end up being an API call to your REST API with the payload derived from the email address and extension.
See it in action
Within Notificare, email can be used not only to send rich content messages to a selective audience, but also as an incoming trigger to send a push message to a specific user. As always, if you would like to know more about these features in Notificare or if you have a question about the subject of this blog post, please feel free to reach out to our Support Team.


