Creating, updating and distributing Digital Cards

Streamlining tickets, memberships and rewards programs
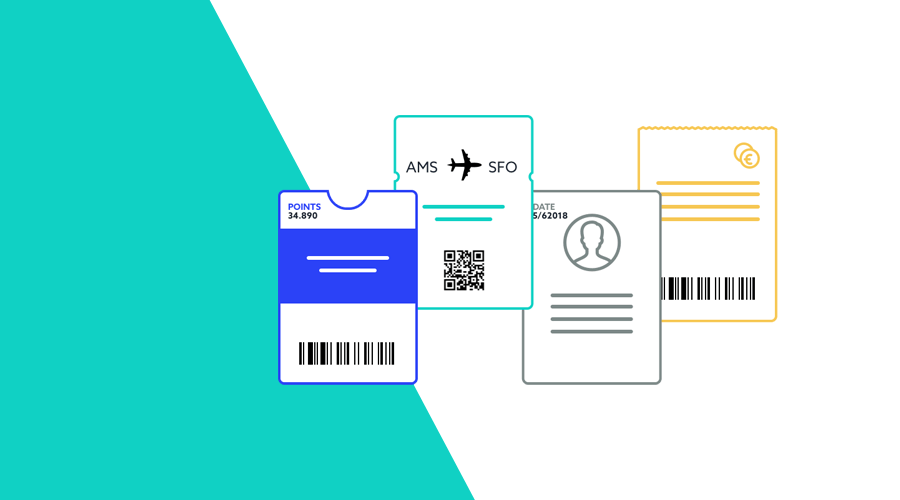
With Notificare, creating digital cards compatible with Apple's Wallet app has been powering retailers for years. By extending existing offline membership and reward programs, brands have created almost 100 million cards in our platform since its inception.
Digital cards augment their offline counterpart. Thanks to their nature, they offer unmatched functionality and live in users' most personal devices, their phone and watches. Although they do play well side-by-side with a mobile app, an e-commerce website or any other app in a brand's loyalty landscape, they can stand on their own, sometimes even replacing conventional single-purpose apps tailor-made for loyalty programs.
This effective medium can also be deployed within a fraction of the time and money needed to build similar solutions, quickly returning the investment needed when subscribing to this Notificare add-on feature. Its unique characteristics will have businesses of all kinds acquiring, engaging and growing their mobile audience in record time.
Getting started
Our Loyalty add-on can be configured quickly. It will require you to upload a Pass Type ID certificate that you generate in Apple's Developer Portal. This certificate will allow us to cryptographically sign and compress all the cards you will create. To learn more about how you set up this add-on service, please read this guide.
Pass Templates
After this initial configuration, you can focus on creating pass templates. These templates will allow you to quickly bootstrap pass creation. Using our intuitive interface, you will be able to create as many templates as you need.
Passes can have several purposes; for example, a boarding pass will provide all you need to create passes for any type of transit system, such as a train ticket, airline boarding pass, or any other type of transportation. Tickets are specially made for users to gain access to a concert, movie theatre or sporting event. Coupons are meant to offer users special offers or discounts. Store cards are appropriate for membership cards and gift cards. And if none of these fit your needs, you can still choose to create a generic card.
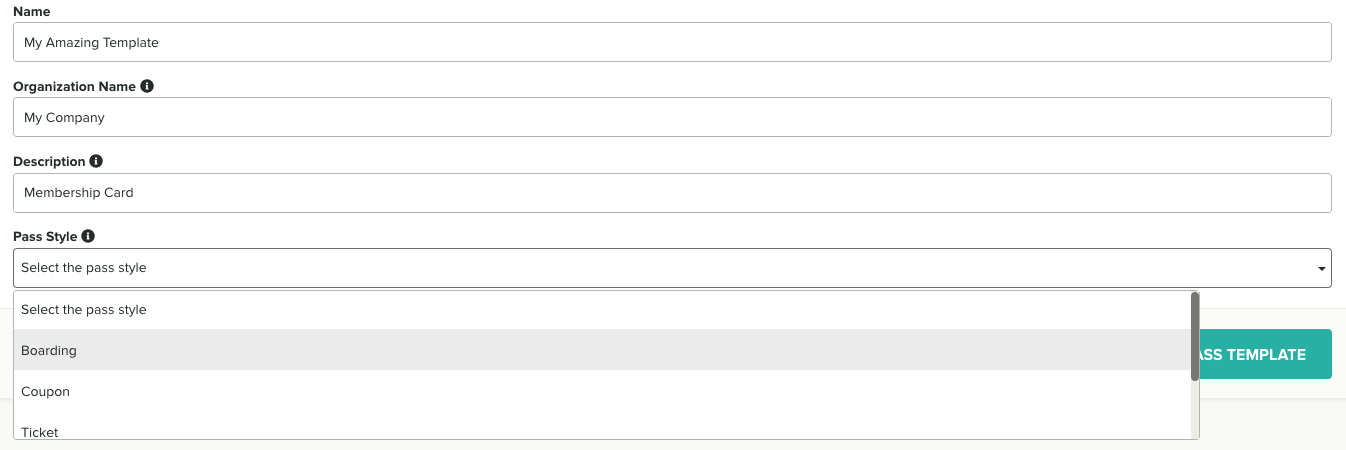
These styles also dictate the overall appearance of your passes. Once a style is selected it can't be changed. However, you can create as many templates as you need and customize certain parts of your passes, like the images you include and the colors you use. To learn more about pass styles please read this guide.
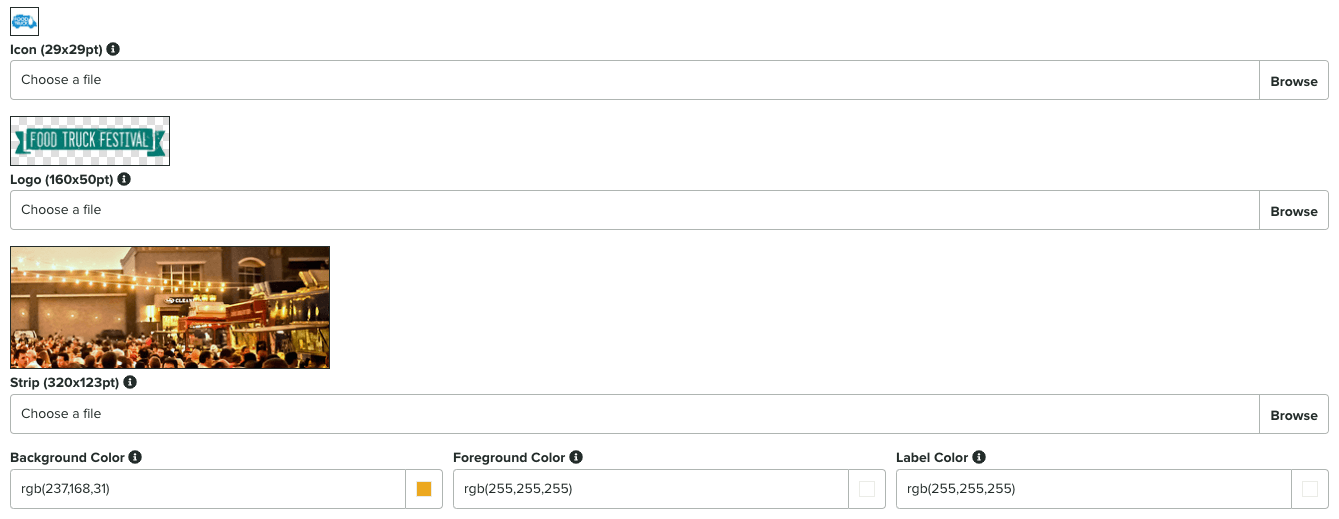
Creating an unique design for your templates is also a great way of designing passes to match the look and feel of your brand. In a template, you will need to provide all the mandatory imagery (according to the style you choose) and customize the colors used in your passes.
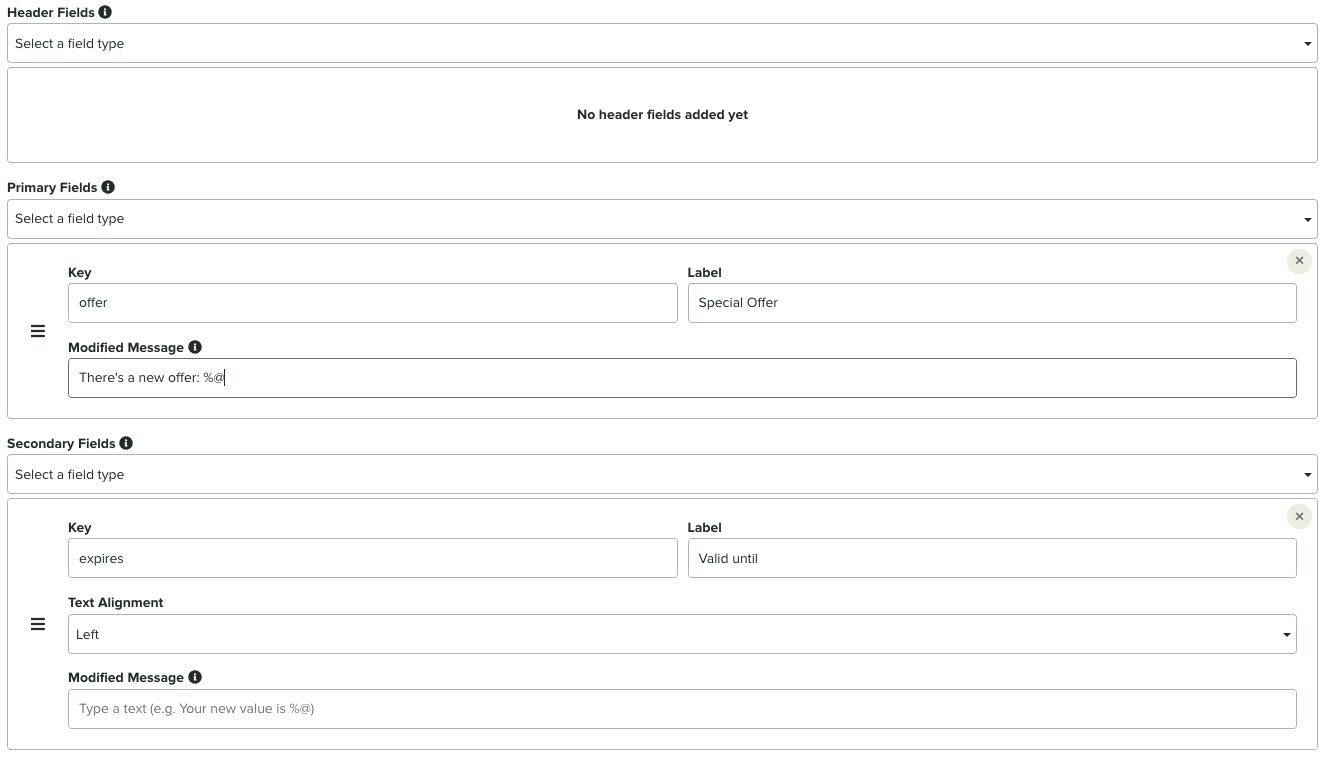
Passes can also contain data and these fields will display text in your passes. These fields are broken into different types. Primary fields will be the most important and prominent set of data in your card. Secondary and auxiliary fields will be less important. Header fields will be visible at the top of the card and will be the only fields shown when passes are stacked in Apple's Wallet app.
Space in the front of the pass is at premium and can only contain a limited amount of data. It should be reserved for the most important information, the one needed when showing a pass at the boarding gate, store or venue. For this reason, the back fields are meant to display additional data. The back of the pass can contain as many fields as you need and their size can be much longer.
The pass template is where you define the fields your passes will contain. They can also support some formatting, they will have an alignment and they can have a date or number format. They can also include a modified message, which will be displayed to the user (pretty much like a push notification), whenever the value of the field changes. These are great if you would like to inform users of changes in their passes.
Finally, a pass template will contain information about the type of barcode you wish to use in your pass. A pass can have one of the following barcode formats: QR Code, PDF417, Aztec or Code128. Deciding which type of barcode you should use will be dictated by the type of data you want to encode. Additionally, most laser scanners are not designed to read barcodes displayed on LCD screens. Therefore, you will need optical scanners to reliably scan these cards when displayed in a smartphone.

Creating Passes
Once you've created at least one pass template, you are now ready to start creating passes. Passes can be created directly in our dashboard. Pretty much the same way you create a pass template, you can also create a pass. You start by selecting a template and defining all the values for the fields that the template contains. It is also possible to change the look and feel of the template on a per-pass basis. Additionally, a pass will also require a redeem option. This will determine how many times your pass can be scanned before being voided. You can choose to set this option to Always, Once or N number of times.

If you are planning to redeem passes upon scanning, your POS software should be able to integrate with our REST API. Additionally, we also offer a free scanner app that can provide this functionality. You can download these apps in the App Store, Google Play or Huawei AppGallery.
Optionally, you can also define an expiration date for your pass. An expired pass will be voided automatically and making it impossible to be scanned after the expiration date.

Passes also can contain relevance fields. These will dictate if a pass should be prompted automatically on the device's lock screen. Passes added to the Wallet app can be relevant during a certain period of time (except in Store Cards and Coupons where date relevance is not supported) or because a user is in a certain location. In the example below, you can see what a pass looks like when a user is near a relevant location:
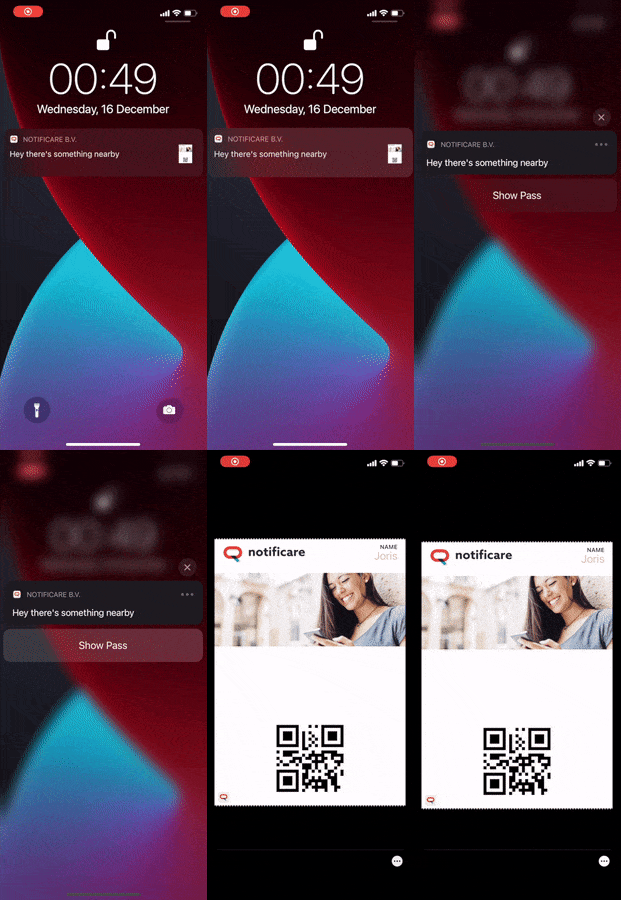
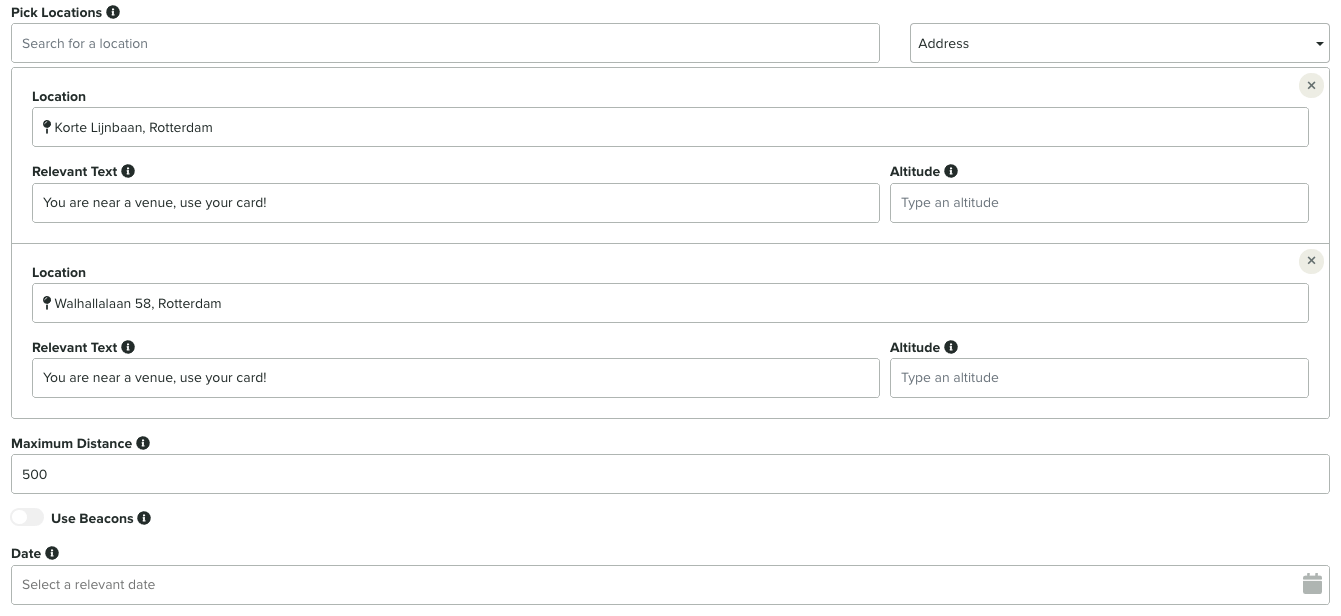
A pass can support up to 10 different coordinates and 10 different BTLE beacons. For use cases where you need more than 10 locations or beacons, you will need to update the passes to make sure they always contain the 10 most relevant locations or beacons accordingly. Passes will also accept a relevant date (when date relevance is supported) and that will also prompt the pass to be shown on the device's lock screen during a certain period of time.
Finally, the pass barcode value must be a unique identifier. You can choose to match this with a value recognized by your own system (POS software, CRM, etc) or left blank to be randomly generated by Notificare:

Obviously, creating passes manually via our dashboard is not a feasible solution for businesses looking to distribute large amount of passes. In some cases, an organization will create those in response to a signup in a mobile app or website. For those scenarios, you will want to create these passes via our REST API. By using a pass template previously created in our dashboard, a system can now easily create a pass using a simple HTTPS request:
POST https://push.notifica.re/pass/passbook/1d9e80ef851d212aca82cf23

{
  "passbook": "1d9e80ef851d212aca82cf23",
  "barcode": 18847737723,
  "data": {
    "expirationDate": "2019-08-24T14:15:22Z",
    "beacons": [
      {
        "proximityUUID": "string",
        "major": "string",
        "minor": "string",
        "relevantText": "string"
      }
    ],
    "locations": [
      {
        "latitude": 0,
        "longitude": 0,
        "altitude": 0,
        "relevantText": "string"
      }
    ],
    "fields": {
      "origin": "AMS",
      "destination": "OPO",
      "gate": "D3",
      "seat": "42A"
    }
  },
  "redeem": "always"
}
There are also certain use cases, where organizations will want to create a large quantity of passes in one single operation. For this scenario, you can use our Batch Passes Import. These import jobs are perfect for bulk creation of passes and you can easily create millions of passes with one single CSV file:
pass_barcode,pass_boarding,pass_origin,pass_destination,pass_flight,pass_gate,pass_seat,pass_locations,pass_relevant_date,pass_expiration_date
12345,930P,AMS,MSY,KL1234,D2,42A,"52.3105;4.7683;;You are here|29.9911;-90.2592;;You are there",2017-08-29T21:00:00,2017-08-30T00:00:00
12346,930P,AMS,MSY,KL1234,D2,42A,"52.3105;4.7683;;You are here|29.9911;-90.2592;;You are there",2017-08-29T21:00:00,2017-08-30T00:00:00
Additionally you can also automate how these import jobs are created by using our Scheduled Import Tasks.
Distributing Passes
Great! You have now created your passes and you want to let your users know about it. Passes can be distributed via Push, Email, SMS or by just sharing a link on your website. Each pass will have its own universal link, one that will open the corresponding Wallet App pass or web fallback (for Android and desktops) automatically depending on the device being used.
You can already include those links in campaigns generated via our dashboard, but in most cases, you will also want to streamline how that happens. For each import job you create, you can also automatically generate a Push, Email or SMS message. As soon as a pass is created via an import job, Notificare will automatically send a message using a message template.
You will to first create a Push, Email or SMS template and then you can define that template in the import job:

This message template can also contain placeholders that will be automatically replaced by Notificare with arbitrary data you include in the CSV file (including the universal link to the pass):
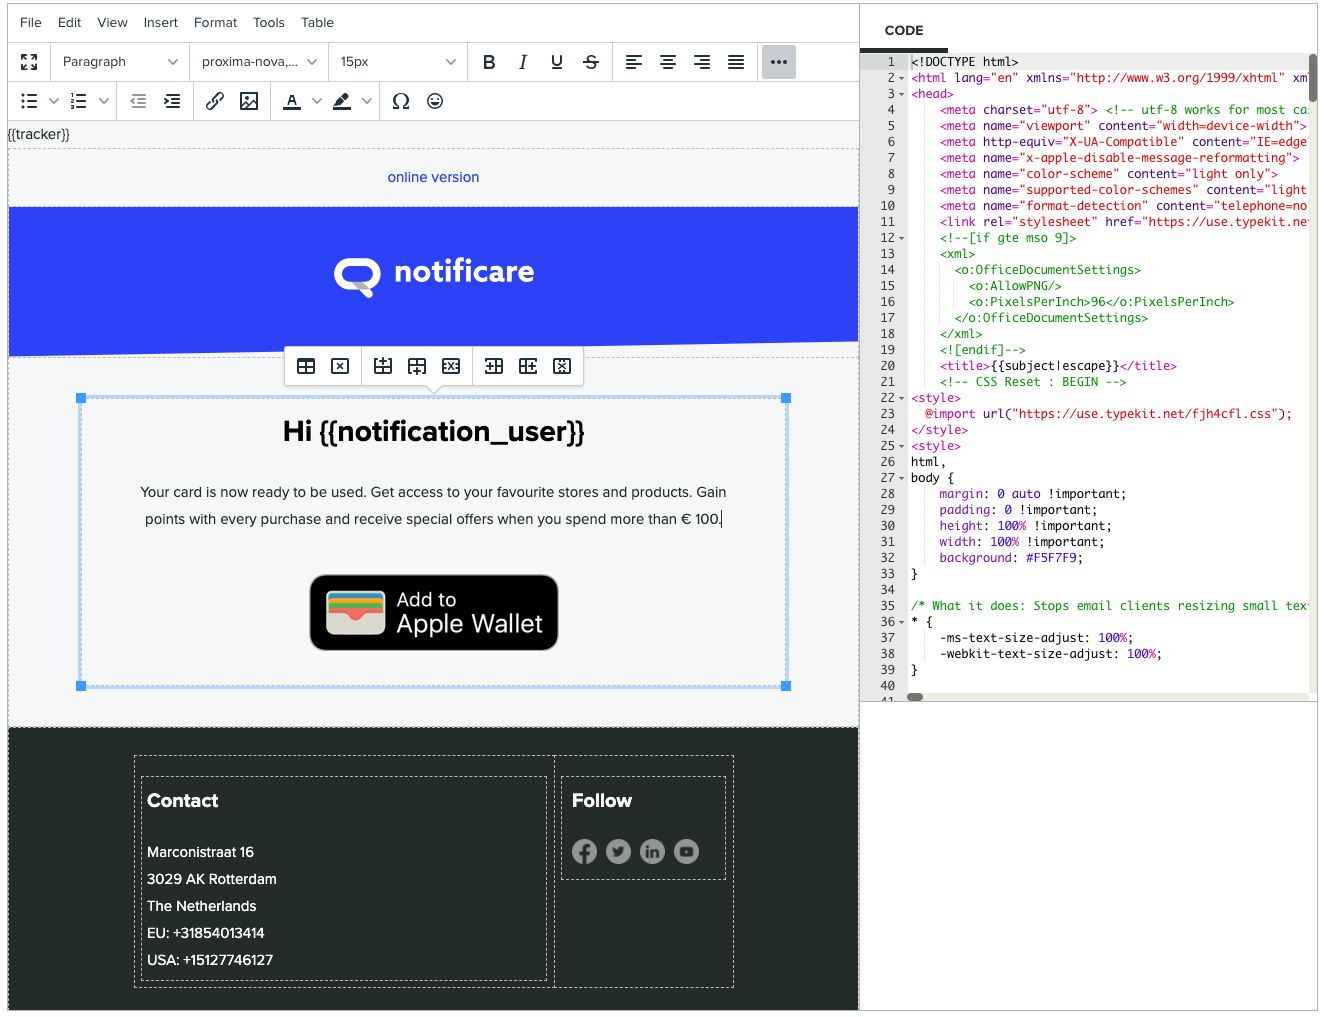
By using a slightly different CSV format:
userID,pass_barcode,pass_boarding,pass_origin,pass_destination,pass_flight,pass_gate,pass_seat,pass_locations,pass_relevant_date,pass_expiration_date,notification_user
joris@notifica.re,12345,930P,AMS,MSY,KL1234,D2,42A,"52.3105;4.7683;;You are here|29.9911;-90.2592;;You are there",2017-08-29T21:00:00,2017-08-30T00:00:00,Joel
joel@notifica.re,12346,930P,AMS,MSY,KL1234,D2,42A,"52.3105;4.7683;;You are here|29.9911;-90.2592;;You are there",2017-08-29T21:00:00,2017-08-30T00:00:00,Joris
You can easily personalize the content in the message that is sent, as soon as the import job is completed.
Updating Passes
Pretty much the same way, you can also update existing passes. For example, you might want to inform a user of a gate change in a boarding pass or update the loyalty points of a membership card. This is where updating passes will come into play. These changes can be triggered by a 3rd party system via our REST API:
PUT https://push.notifica.re/pass/1d9e80ef851d212aca82cf23/fields

{
  "data": {
    "fields": {
      "gate": "D2",
    }
  }
}
Or via a Batch Update Pass Fields Import. When updating a pass, you will only need to include the data you want to update, as shown in the example below:
pass_barcode,pass_gate
12345,D2
12346,D2
Caveats
At the moment, our Loyalty add-on does have certain limitations. Because Google Pay cards are not available in some countries, passes generated by Notificare will be displayed in an Android mobile app using our SDK (if installed on the user's device) or open a web version of the pass (if no app is available). But this is due to change soon. As we write this post, we are hard at work developing the next major release of our Loyalty add-on, which will contain support, not only for Google Pay, but also for the Huawei Wallet.
For those of you who already are running loyalty programs with us, we will provide a migration wizard that will transform your current Apple Wallet cards into universal passes that can be used in iOS, Android (with Google Play Services and Huawei Mobile Services) and Web (desktop).
Interested?
Streamlining tickets, membership cards or reward programs that deliver innovative functionality is easier than you think. Acquire more users with less costs and expand your brand's omni-channel strategy in one single sweep. If you would like to see this in action, feel free to request a demo from our Sales Team or let our Support Channel answer any question you might have.
