In this post, we will dive a little deeper into how we can leverage users' location in an app, by requesting temporary access and only when your app's features need it.
As announced in this post from last year, iOS 15 introduced a simple, yet powerful, new way of requesting the user's location. Prior to iOS 15, when an app requests for location authorization, an initial prompt shows up and people have the ability to choose from Allow Once, While in Use, or Don't Allow authorization.
Although this might seem good enough, for some apps, access to the user's location is really only needed if a certain feature requires it. For example, an app might only need to show the nearby locations in a map but not when when users are browsing for a product or a news article.
Of course, users could already select the Allow Once option, which will allow your app to collect the location for the duration of the session. As soon as the app enters in background, a new permission would be required, which may negatively impact the user experience.
To tackle this use case, iOS 15 introduced a new feature that will allow you retrieve the location of the user only once but will skip the permission prompt in subsequent usages.
Meet the Location Button
With iOS 15, Apple introduced CLLocationButton for UIKit and LocationButton for SwiftUI, allowing you to request the user location only once without making people go through the prompt each time.
It is also super easy to implement in your app. Basically, you have at your disposal a button, just like UIButton, that you can quickly add to your app's views. For example, consider the following SwiftUI code:
struct MyView: View {
    @State var manager = CLLocationManager()

    var body: some View {
        ZStack(alignment: .bottom) {
            MapView(manager: $manager)
                .edgesIgnoringSafeArea(.all)
            LocationButton(LocationButton.Title.currentLocation) {
                manager.startUpdatingLocation()
            }.foregroundColor(Color.white)
                .cornerRadius(27)
                .frame(width: 210, height: 54)
                .padding(.bottom, 30)
        }
    }
}
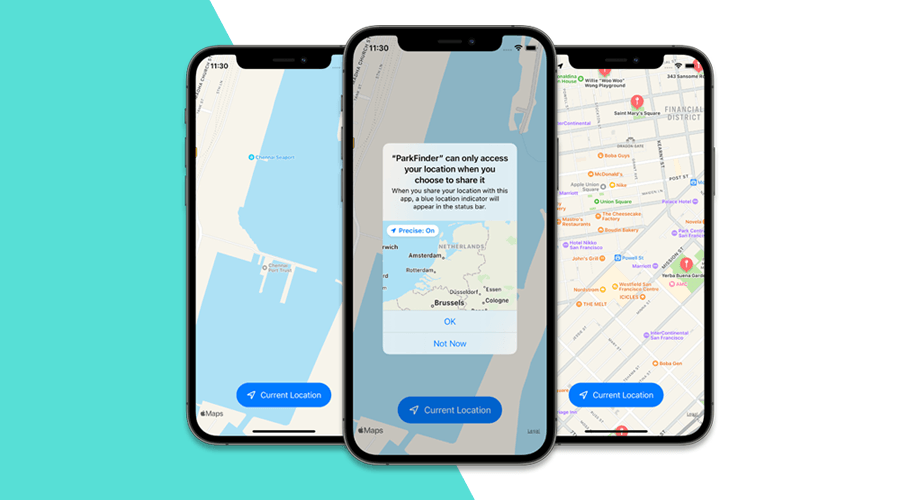
As you can see, just like any button, you can also customize its title, colors and corner radius to make it match your app. The end result would be something like this:
Using a location button will take care of requesting the appropriate authorization and all you need to do is start updating the location. The very first time a user clicks in this button, it will prompt the following dialogue:
And as soon as it is granted, you can start handling location updates, in the same way as you would prior to iOS 15:
class MyLocationClass: NSObject, CLLocationManagerDelegate {

    ...

    func locationManager(_ manager: CLLocationManager, didUpdateLocations locations: [CLLocation]) {
        if let location = locations.last {
            // Do something with the location
        }
    }
}
Basically, under the hood, iOS will grant your app the Allow Once authorization status, which will expire as soon as the app enters background. The difference is that when a user comes back and clicks the button again, the permission dialogue will not be shown anymore, and all your app has to do is retrieve the user's location.
Cool, right?
As you can see, requesting a user's location can be simple, effective and not intrusive at all. And unless you want to leverage other technologies like geo-fencing or beacons, using the Location Button might be just what you need.
As always, we hope you liked this article and if you have anything to add, we are available via our Support Channel.


