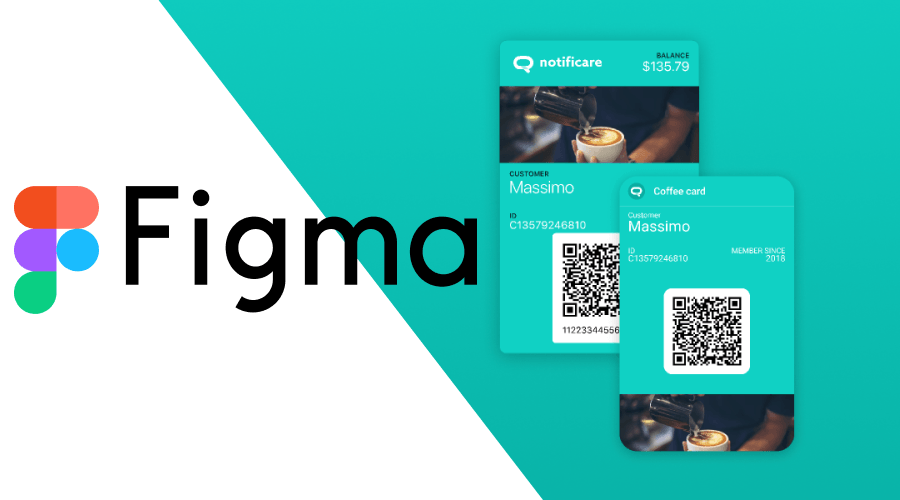
How to Design a Wallet Pass from Figma Template

Streamline Your Wallet Pass Creation with Figma Templates

Designing wallet passes for Apple Wallet and Google Wallet can be a complex task, especially for marketers who may not be deeply familiar with design tools. Fortunately, Notificare offers a solution with their comprehensive Figma template. This guide will walk you through the process of designing a wallet pass using the Notificare Figma template, ensuring that your passes are both visually appealing and functional. Wallet passes have become an essential tool for businesses aiming to enhance customer engagement and loyalty. These passes allow businesses to provide customers with digital coupons, tickets, and loyalty cards that can be easily accessed via their mobile devices. To simplify the design process, Notificare has developed a Figma template that caters to both Apple Wallet and Google Wallet. This template includes all the necessary design elements, allowing marketers to create stunning wallet passes without requiring advanced design skills.
Getting Started with Notificare's Figma Template
Before diving into the design process, it's crucial to understand what the Notificare Figma template offers. The template includes various design elements tailored for Apple Wallet and Google Wallet, ensuring compatibility and optimal performance across both platforms.
Accessing the Template
To begin, access the Notificare Figma template. Ensure you have a Figma account to open and edit the template. This template is a valuable resource that provides a head start in designing wallet passes, saving you time and effort.
Exploring the Template
Once you have the template open in Figma, take a moment to familiarize yourself with the different components. The template is organized into sections for Apple Wallet and Google Wallet, each containing specific design elements such as backgrounds, text fields, and icons.
Apple Wallet Components
The Apple Wallet section includes elements like the pass header, primary and secondary fields, auxiliary fields, barcode, and background images. These elements are pre-designed to meet Apple’s specifications, ensuring that your pass looks professional and functions correctly.
Google Wallet Components
Similarly, the Google Wallet section contains all necessary elements, such as logos, title fields, value fields, barcodes, and background images. These components adhere to Google’s design guidelines, providing a seamless user experience on Android devices.
Customizing Your Wallet Pass
Now that you're familiar with the template, it's time to customize it to fit your brand's needs. Here’s a step-by-step guide to creating a unique wallet pass using the Notificare Figma template.
Define Your Purpose
Before making any design changes, clearly define the purpose of your wallet pass. Are you creating a loyalty card, a coupon, or an event ticket? Understanding the purpose will guide your design choices and ensure that the pass meets your objectives.Customize the Background
Start by selecting a background image or color that aligns with your brand identity. The template includes several options, but you can also upload your own images. Ensure that the background does not interfere with the readability of the text and barcode.Add Your Branding
Incorporate your brand’s logo and colors into the design. Place your logo in the designated area and adjust the colors of the text and other elements to match your brand’s color scheme. Consistent branding helps in maintaining a professional appearance and strengthens brand recognition.Input Key Information
Next, fill in the key information fields. This includes the primary and secondary fields for Apple Wallet or the title and value fields for Google Wallet. Ensure that the text is concise yet informative, providing users with all necessary details at a glance.Configure the Barcode
The barcode is a crucial element of your wallet pass, allowing it to be scanned and validated. The Notificare template includes a placeholder for the barcode. Make sure to replace this with your actual barcode, ensuring it is scannable and correctly formatted.
Tips for Effective Wallet Pass Design
Creating a wallet pass is not just about following steps; it’s about making strategic design choices that enhance user experience and meet business goals. Here are some tips to keep in mind:
Keep It Simple
Avoid cluttering the pass with too much information or overly complex designs. A clean, simple layout is more visually appealing and easier for users to understand.
Prioritize Readability
Choose fonts (not much choice) and colors that are easy to read, even in different lighting conditions. High contrast between the text and background ensures better readability.
Use High-Quality Images
Ensure that any images used are of high quality and resolution. Low-quality images can make your pass look unprofessional and may affect user perception.
Test on Multiple Devices
Before finalizing your design, test the wallet pass on multiple devices to ensure it looks and functions as intended. This step helps in identifying any issues related to compatibility and user experience.
Update Regularly
Keep your wallet passes updated with the latest information and offers. Regular updates keep users engaged and ensure that the passes remain relevant.
Exporting and Implementing Your Design
Once you’ve completed the design, it’s time to export and implement your wallet pass. The Notificare Figma template makes this process straightforward.
Exporting from Figma
In Figma, use the export feature to save your design elements. Ensure you export the images in the correct format and resolution for both Apple Wallet and Google Wallet.
Uploading to Notificare Dashboard
Log in to your Notificare Dashboard and navigate to the wallet pass creation section. Upload the exported images and configure the pass settings according to your needs. Notificare’s platform provides a user-friendly interface for managing your digital passes.
Conclusion
Designing a wallet pass from a Figma template is an efficient way to create professional and functional digital passes for both Apple Wallet and Google Wallet. Notificare’s template simplifies this process, making it accessible even for marketers with limited design experience. By following the steps outlined in this guide, you can create stunning wallet passes that enhance customer engagement and support your business goals.
