It has been a while since we last posted about testing push notifications in iOS Simulator. After almost 7 years, a lot has changed and with the latest release of Xcode (version 11.4 released recently) it is now possible to natively test how incoming notifications behave without a real device.
Since we've introduced our Inbox feature in 2016, developers have been using it to test notifications while debugging their apps in the simulator. Since Apple's Push Notification Service can only send notifications to real devices, most of you found that when using this feature, it is at least possible to test if all the types of notifications, we support, are displayed as expected.
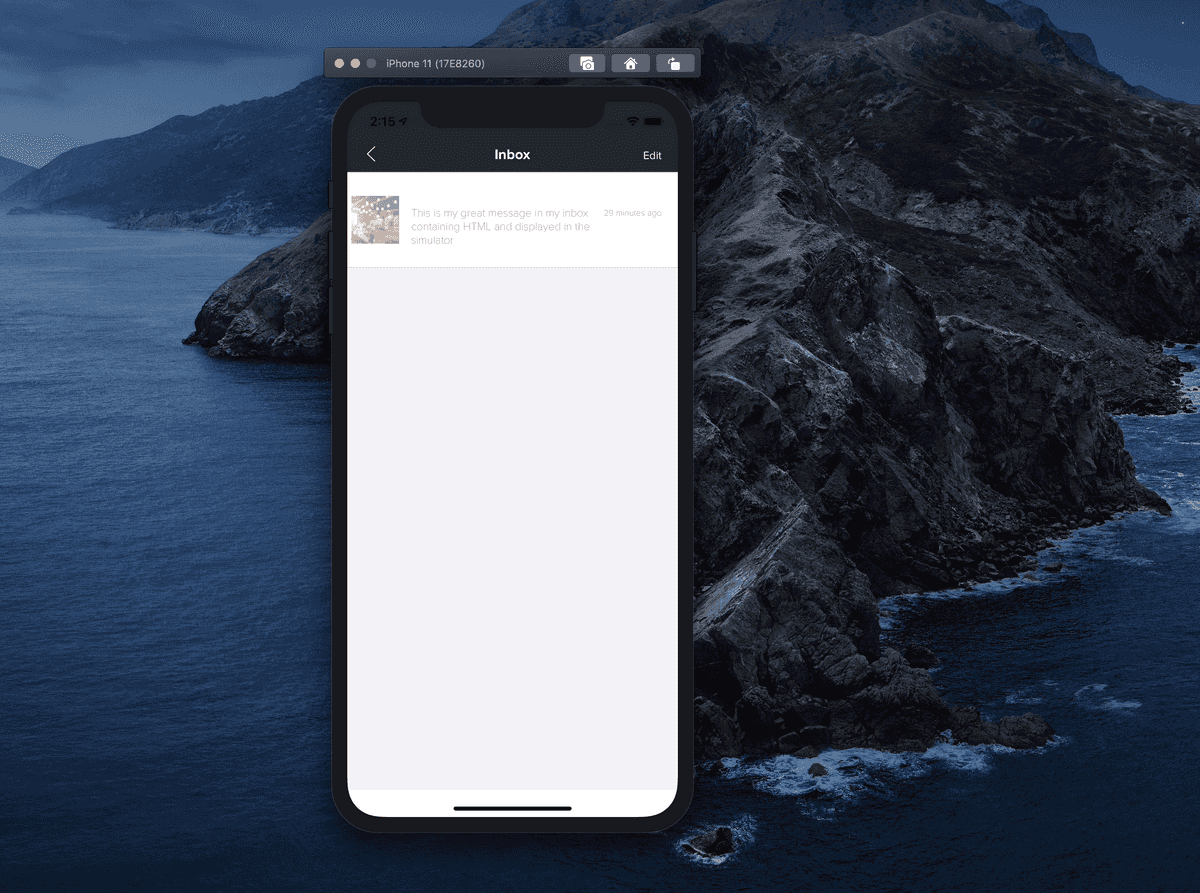
This is still a great way to test this functionality since any notifications you send through our dashboard, targeting simulator devices, will be visible in the list of messages you retrieve when you implement our Inbox functionality:
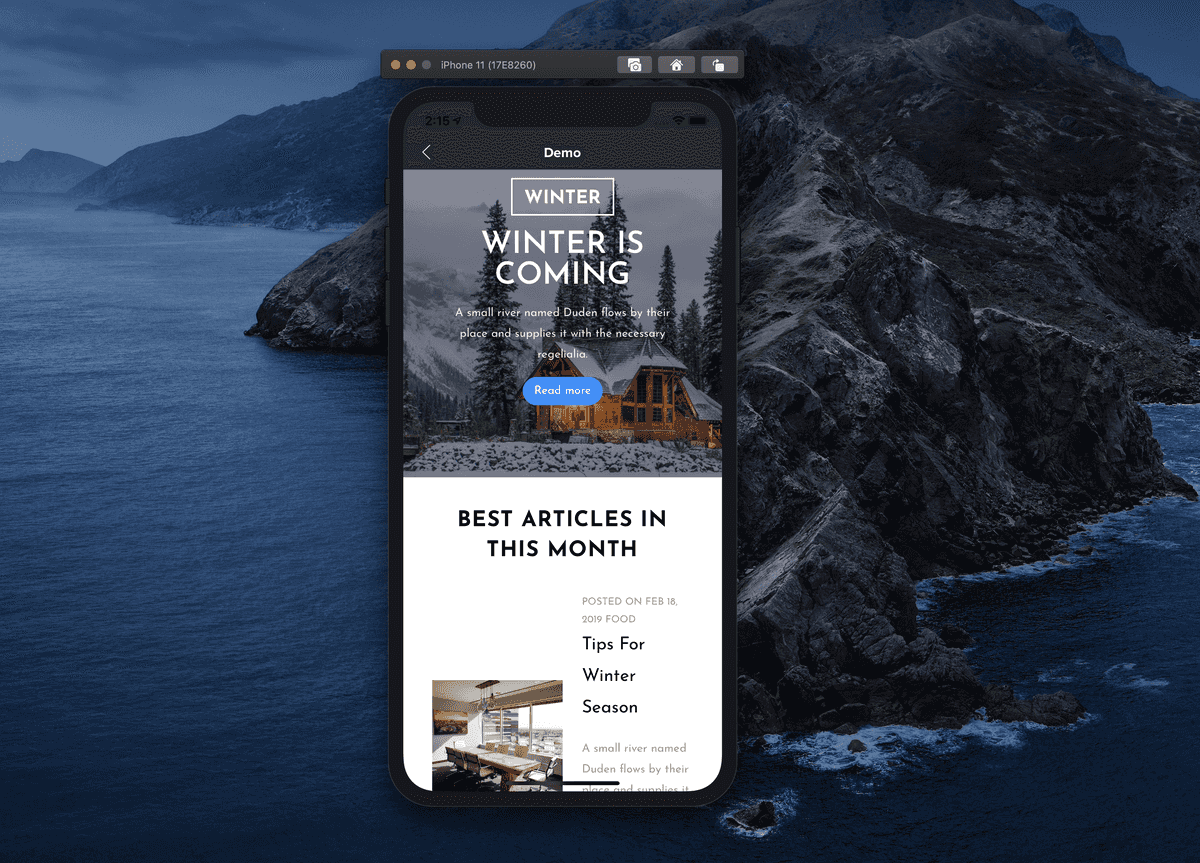
It is also possible to see exactly how they will look like and behave whenever you click in those messages:
This is great, but it not a complete test scenario. You will want to also test when notifications arrive and you click on them from the notification center.
So... what changed?
In Xcode 11.4, this is now possible! If you've already downloaded the latest Xcode, let's give it a try. Make sure you've also installed all the additional components included in Xcode and run your app in the simulator. If you've already accepted the notification's permission dialogue to send alerts, badges and sounds, go ahead and put your app in background. Then create an .apns file with the following content (using your favourite text editor):
{
	"Simulator Target Bundle": "my.amazingapp.bundle",
	"aps": {
		"alert": {
			"body": "Testing a notification"
		},
		"sound": "default",
		"badge": 1,
	}
}
Save that file (make sure you replace the Simulator Target Bundle with your own bundle identifier) as a xxx.apns file and drag it to your simulator window, it should now generate an alert like the one below:
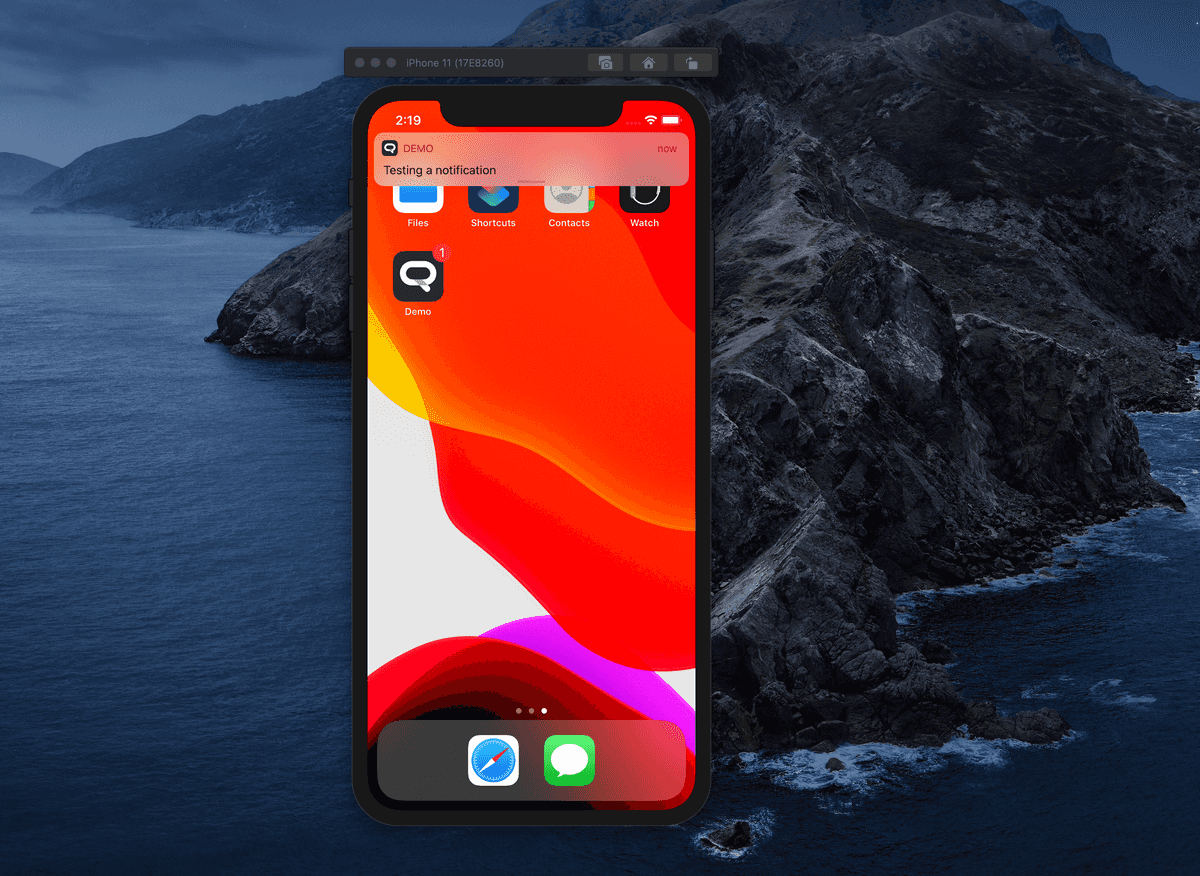
Great right? This will already display a banner, play a sound and show a badge in your app.
But this is still not all you want to test. The payload you just simulated is not a valid Notificare payload, so clicking on that notification will not display any content.
To take this even further, you will want to create multiple messages for that simulator device in our dashboard. Use all the types of content and actions you want to test, then simply navigate to the list of inbox messages in that device profile, by expanding the Options menu and clicking in Inbox:
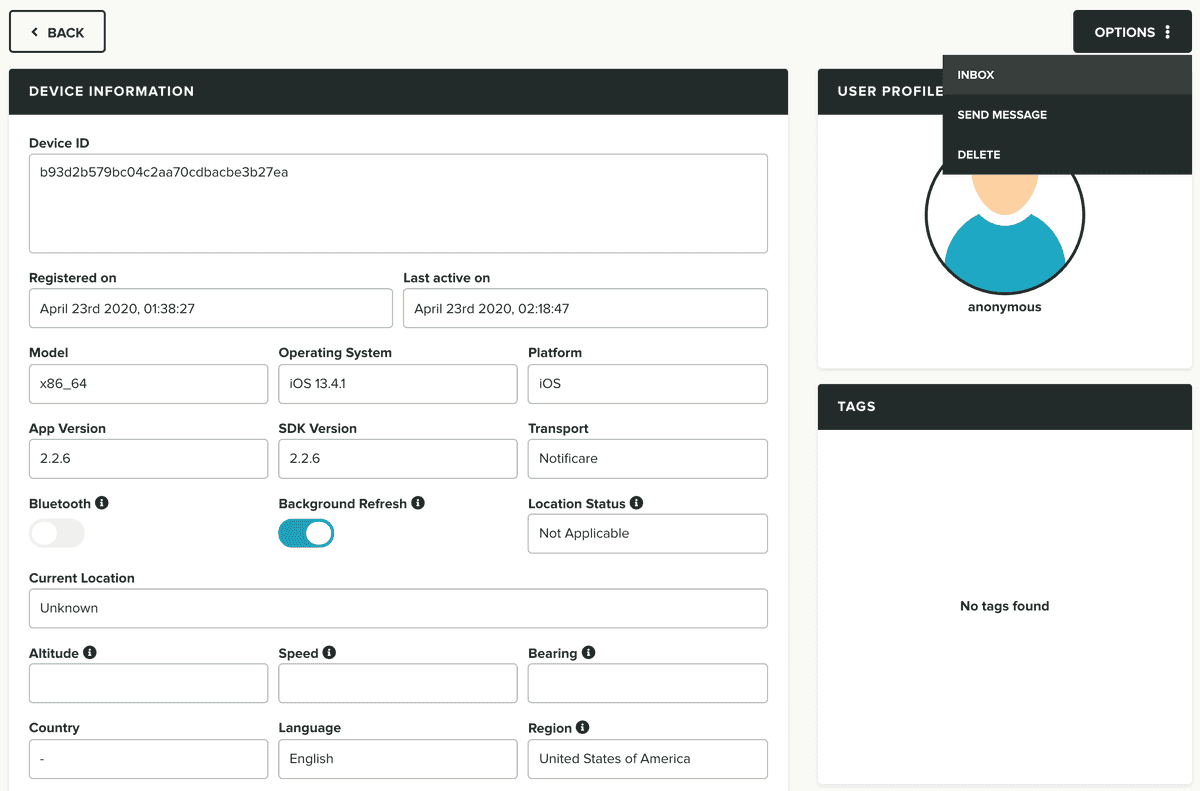
There you will find all the messages you've already created and for each one of them you can download its specific .apns file like shown below:
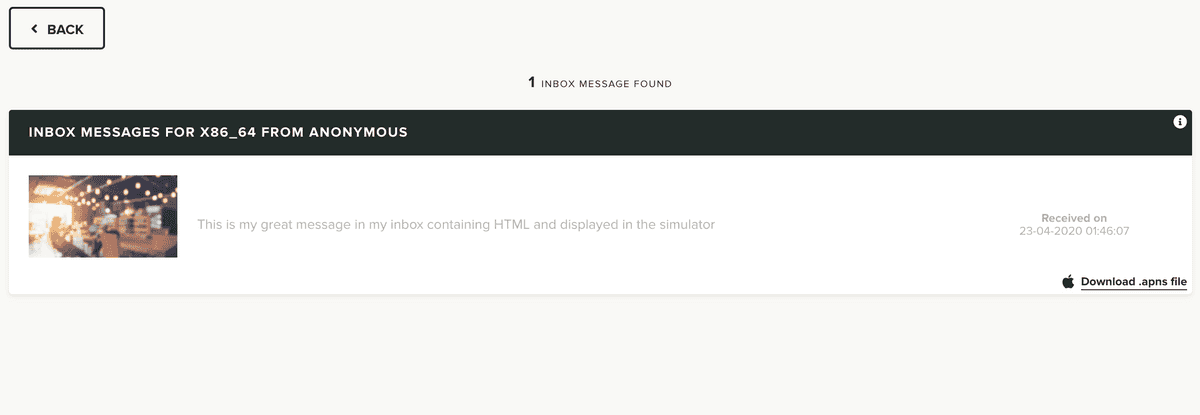
Clicking on those links will download a file named notification.apns with which you can repeat the step above and drag it to the simulator. It will now generate a fully compliant Notificare notification that you can click and open its content.
Using the terminal
This can also be triggered when using the terminal. To do that, you need to first find out the device identifier for your simulator. This is done inside Xcode by going to Window > Devices and Simulators (or Shift + Command + 2):
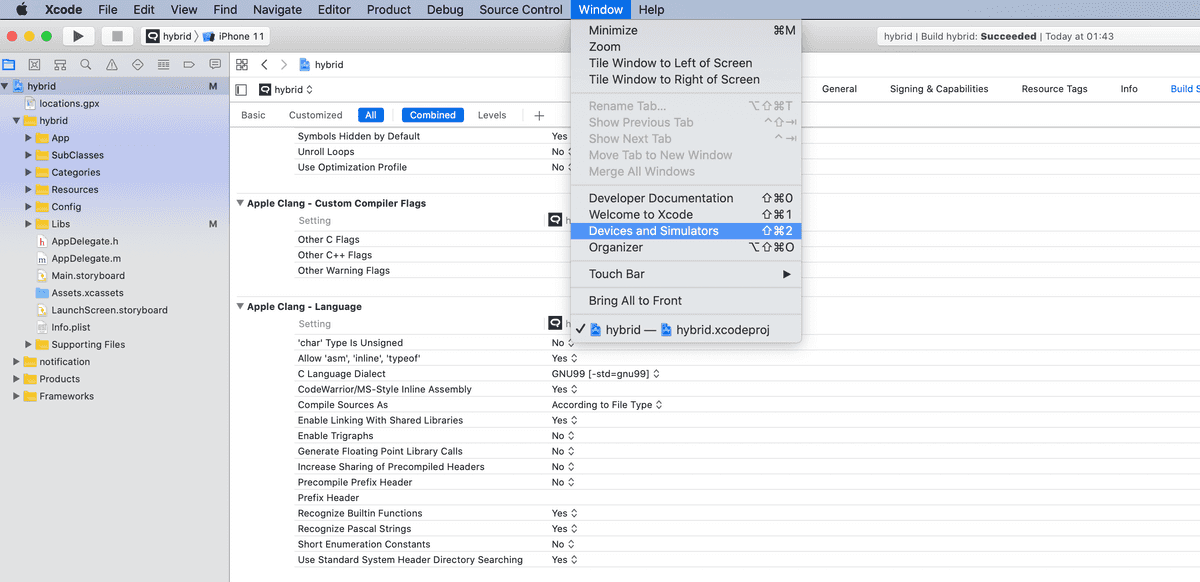
This will open a window containing all the devices and simulators you have. Click the Simulators tab and click in the simulator you are performing tests. In that view you will find the device identifier like shown below:
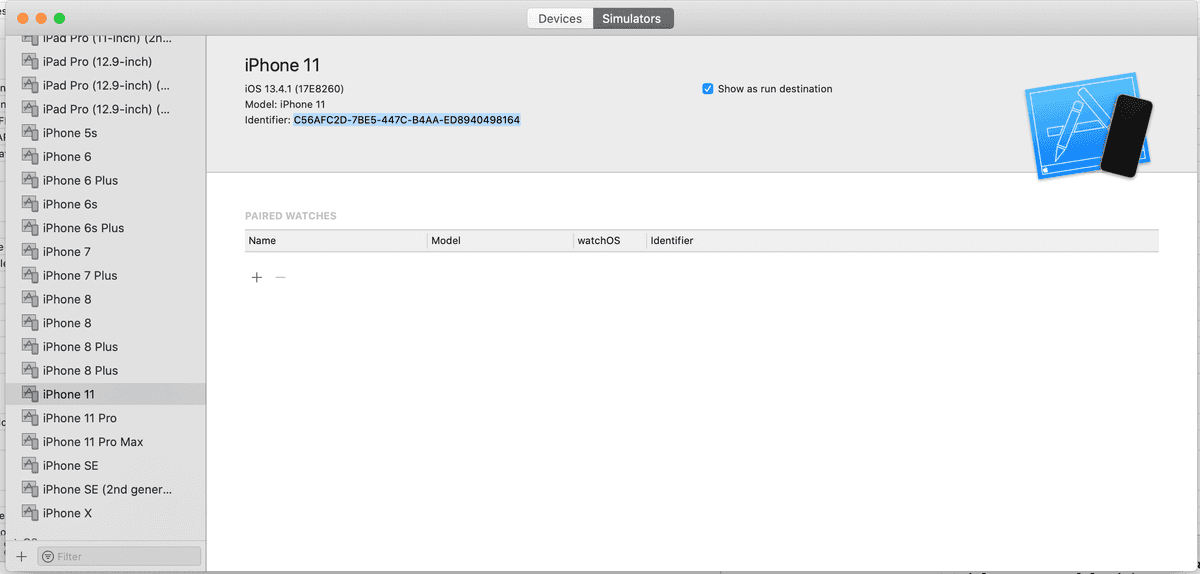
Copy and save that UUID as we will need it later to run commands in the terminal. Now assuming you've downloaded the .apns file like explained before and save it in your Downloads folder you can run the following command in your terminal:
xcrun simctl push <device_uuid> <bundle_identifier> ~/Downloads/notification.apnsOf course, you need to make sure you replace <device_uuid> with the simulator identifier you just copied, <bundle_identifier> with your own identifier and that you're actually pointing to the correct path of the notification.apns file in your machine. This will generate the exact the same notification as it did when you drag the file unto the simulator window.
Caveats
We did find out some limitations, and although this effectively will allow you to test incoming notifications, including banners, sounds, badges and even Rich Push categories, it seems that the mutable-content property is not honoured, preventing you from testing Notification Service Extensions which basically translates to not be able to see the lock screen image you include in your messages.
We hope Apple can address this issue and fix it in their next release. 🤞
Ready to try it out?
If you would like to know more and you have any questions, we are available, as always, via our Support Channel.


