While developing for iOS, the simulator is a great resource. It's a great way of testing your apps without a physical device. Its friendly graphical interface can speed things up and emulate very well many features of real devices. But using the terminal is also a great way to speed things up and the only way to create useful scripts for Continuous Integration servers.
Using simctl
Apple's command line utility to interact with the iOS simulator, simctl, is a poorly documented binary that comes bundled with Xcode in /Applications/Xcode.app/Contents/Developer/usr/bin/simctl and therefore you can run it using xcrun. You can list all the available options by running the following command:
xcrun simctl helpManaging Simulators
Using simctl, we can perform several tasks including how you manage, create, rename, erase, upgrade, boot and shutdown simulators.
List simulators
To obtain the list of simulators use the following command:
xcrun simctl listThis will give you a list of all simulator devices, runtimes and device types:
== Device Types ==
iPhone 8 (com.apple.CoreSimulator.SimDeviceType.iPhone-8)
iPhone 8 Plus (com.apple.CoreSimulator.SimDeviceType.iPhone-8-Plus)
iPhone X (com.apple.CoreSimulator.SimDeviceType.iPhone-X)
iPhone Xs (com.apple.CoreSimulator.SimDeviceType.iPhone-XS)
iPhone Xs Max (com.apple.CoreSimulator.SimDeviceType.iPhone-XS-Max)
iPhone Xʀ (com.apple.CoreSimulator.SimDeviceType.iPhone-XR)
iPhone 11 (com.apple.CoreSimulator.SimDeviceType.iPhone-11)
iPhone 11 Pro (com.apple.CoreSimulator.SimDeviceType.iPhone-11-Pro)
iPhone 11 Pro Max (com.apple.CoreSimulator.SimDeviceType.iPhone-11-Pro-Max)
iPhone SE (2nd generation) (com.apple.CoreSimulator.SimDeviceType.iPhone-SE--2nd-generation-)
== Runtimes ==
iOS 9.3 (9.3 - 13E233) - com.apple.CoreSimulator.SimRuntime.iOS-9-3 (unavailable, The iOS 9.3 simulator runtime is not supported on hosts after macOS 10.14.99.) (unavailable, The iOS 9.3 simulator runtime is not supported on hosts after macOS 10.14.99.)
iOS 11.4 (11.4 - 15F79) - com.apple.CoreSimulator.SimRuntime.iOS-11-4
iOS 13.4 (13.4.1 - 17E8260) - com.apple.CoreSimulator.SimRuntime.iOS-13-4
tvOS 13.4 (13.4 - 17L255) - com.apple.CoreSimulator.SimRuntime.tvOS-13-4
watchOS 6.2 (6.2 - 17T256) - com.apple.CoreSimulator.SimRuntime.watchOS-6-2
== Devices ==
-- iOS 13.4 --
    iPhone 8 (EC45DAEB-04B5-4BC7-BA90-F41D7092E761) (Shutdown)
    iPhone 8 Plus (1B71B733-922D-4E3F-8218-35B0214E0088) (Shutdown)
    iPhone 11 (C56AFC2D-7BE5-447C-B4AA-ED8940498164) (Shutdown)
    iPhone 11 Pro (83A0E104-F321-493A-AB1F-60EFF4AB7219) (Shutdown)
As you can see, each device will have a unique identifier and its state, Shutdown or Booted. With these UUIDs, you will be able to interact with those simulators.
Create Simulators
First, let's see how you would create a new simulator. As you probably noticed, with the previous command, you will have a list of available Runtimes and Device Types:
== Device Types ==
iPhone 11 Pro Max (com.apple.CoreSimulator.SimDeviceType.iPhone-11-Pro-Max)
== Runtimes ==
iOS 13.4 (13.4.1 - 17E8260) - com.apple.CoreSimulator.SimRuntime.iOS-13-4
With these, you can quickly create new simulators. For example, to create a new simulator based on iOS 13.4 and an iPhone 11 Pro, you would run the following command:
xcrun simctl create My-Amazing-Simulator com.apple.CoreSimulator.SimDeviceType.iPhone-11-Pro com.apple.CoreSimulator.SimRuntime.iOS-13-4After running this command, you will get a UUID, which will basically allow you perform all kinds of operations involving this newly created simulator.
Booting Simulator
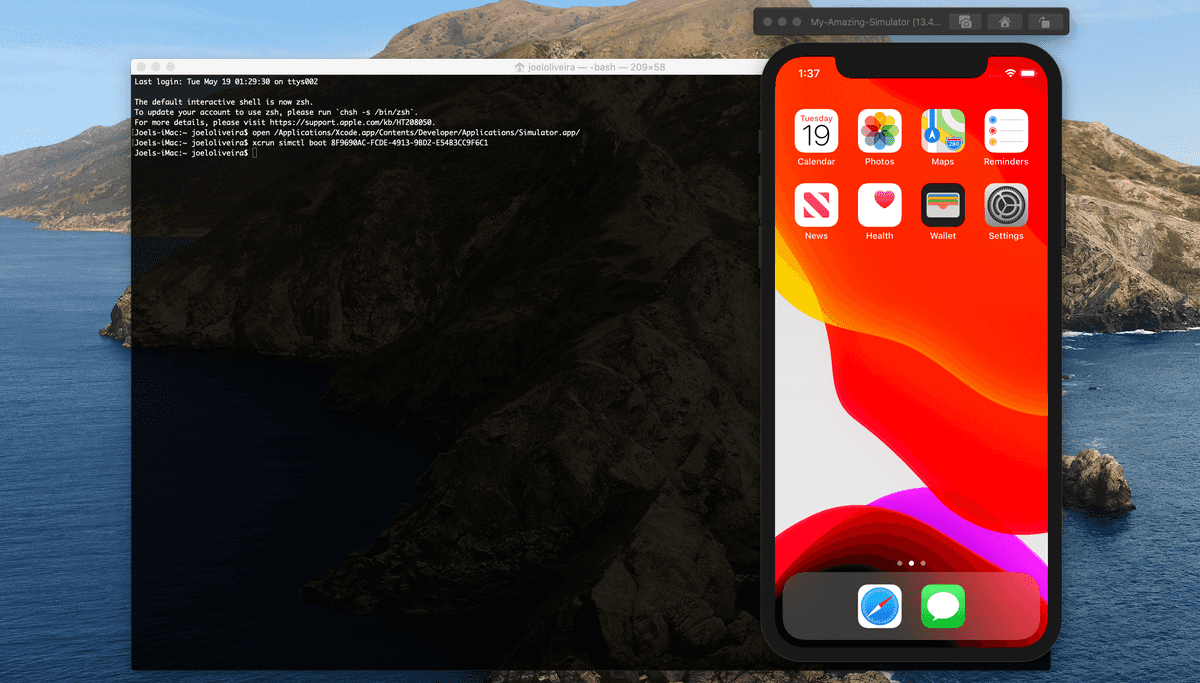
Now let's use the UUID you got to boot it, by running the following command:
xcrun simctl boot 8F9690AC-FCDE-4913-9BD2-E54B3CC9F6C1Then, let's open the simulator app:
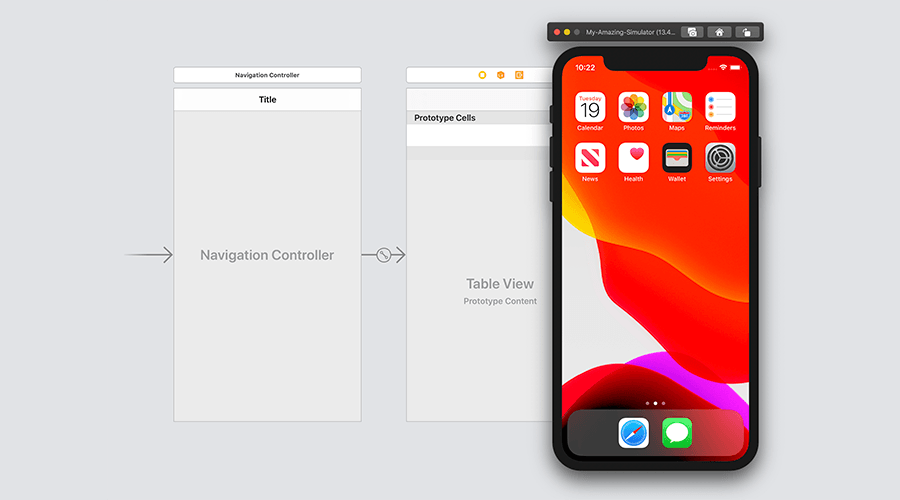
open /Applications/Xcode.app/Contents/Developer/Applications/Simulator.app/This will quickly open the app with the booted simulator:

Shutdown Simulator
Here onwards, by using the UUID you can perform other operations, for example to shutdown the simulator you would run the following command:
xcrun simctl shutdown 8F9690AC-FCDE-4913-9BD2-E54B3CC9F6C1Erase Simulator
Pretty much the same way, you can eventually delete this simulator:
xcrun simctl erase 8F9690AC-FCDE-4913-9BD2-E54B3CC9F6C1If you've installed several versions of Xcode in the same machine, over time, you will accumulate a sizable cache of old simulators. Most of them, will no longer be usable in the latest version of iOS. To clean all these and save a few gigabytes of disk space, you can run the following command:
xcrun simctl delete unavailableSetting Simulator Locale
One of the most annoying tasks when developing an app with multi-language support, is the fact that you will find yourself switching back and forward between different locales. This usually is done via the Settings app in General > Language & Region and by selecting one from a list of locales.
You can accelerate this process using the terminal without necessarily using simctl. Each simulator stores these preferences in a file called .GlobalPreferences.plist. Using the plutil utility, you can edit the contents of any .plist file. For example, use the following command to see the contents of this file:
plutil -p ~/Library/Developer/CoreSimulator/Devices/8F9690AC-FCDE-4913-9BD2-E54B3CC9F6C1/data/Library/Preferences/.GlobalPreferences.plistAdditionally, using plutil, you can easily modify the region settings for a specific simulator:
plutil -replace AppleLocale -string "nl_BE" ~/Library/Developer/CoreSimulator/Devices/8F9690AC-FCDE-4913-9BD2-E54B3CC9F6C1/data/Library/Preferences/.GlobalPreferences.plistAnd the language:
plutil -replace AppleLanguages -json "[ \"nl\" ]" ~/Library/Developer/CoreSimulator/Devices/8F9690AC-FCDE-4913-9BD2-E54B3CC9F6C1/data/Library/Preferences/.GlobalPreferences.plistOpening an URL in Simulator
Another handy operation that you will occasionally need, is the ability to open a specific URL. You can do this using the openurl subcommand. For example to open the browser:
xcrun simctl openurl booted "https://notificare.com"Or if you want to open the Maps app:
xcrun simctl openurl booted maps://?s=RotterdamAnd eventually if you want to open your own app (assuming you've implemented deep linking):
xcrun simctl openurl booted com.myapp://myapp.com/action/buyAdd Files to the Photo Library
By default, a simulator will include a handful of images in its Photo Library. For some apps, you will need to use these to test how images are uploaded to a server or shown as an avatar, for example. You can use simctl to add more media files to the simulator's library by using the following command:
xcrun simctl addmedia booted ~/Desktop/AnImage.pngTake a Screenshot
Another cool functionality is the ability to take a screenshot of the simulator, usually you would use ⌘ + S via the GUI, but this can also be done via the terminal using:
xcrun simctl io booted screenshot ~/Desktop/screenshot.pngRecord a video
Pretty much the same way, you can record a video using the terminal by invoking the following command:
xcrun simctl io booted recordVideo ~/Desktop/video.mp4New features in Xcode 11.4
This version of Xcode shipped with more simctl functionality. For example, you can now emulate push notifications in the simulator using the following:
xcrun simctl push <device_uuid> <bundle_identifier> ~/Downloads/notification.apnsThis specific command is covered in detail in a previous blog post.
Additionally you can also install certificates using the new keychain subcommand. For example you can easily add your own self-signed certificate using:
xcrun simctl keychain booted add-root-cert mycertificate.cerIt is also possible to manage privacy permissions with simctl. For example, to grant location to a certain app installed in the current booted simulators, you can use the following:
xcrun simctl privacy booted grant location <bundle_identifier>Or grant access to the Photo Library:
xcrun simctl privacy booted grant photos <bundle_identifier>Or eventually if you want to reset all permissions:
xcrun simctl privacy booted reset all com.example.appAnother handy command in Xcode 11.4, is the ability to change the appearance of a booted simulator. This will easily allow you to switch between light and dark mode in iOS 13:
xcrun simctl ui booted appearance darkFinally, you can now also override the status bar data using the following:
xcrun simctl status_bar 8F9690AC-FCDE-4913-9BD2-E54B3CC9F6C1 override --time 9:41 --dataNetwork wifi --wifiMode active --wifiBars 3 --cellularMode active --cellularBars 4 --batteryState charged --batteryLevel 100 --operatorName 'Notificare'For those developers, with an eye for detail, this will allow you to customize the status bar of the simulator and take the perfect screenshots or make the best screen recordings.
Conclusion
As you can see, using the terminal (or bash scripts) and simctl, you can programmatically control the simulator, which can accelerate your next round of tests or allow you to create a very complete CI server script. If you have any questions, corrections or simply just want to drop us a line, we are, as always, available via our Support Channel.


