Testing apps like a PRO

No more excuses... quickly test SDK integrations in mobile apps and websites

In a previous post, we've unveiled a whole new Support area, now available directly from our dashboard. Besides providing you with a quick way to submit questions to our team, it can also help you test your app's SDK integration during, after development and just before submitting to the app's market places or before going live with your website.
App Test Reports
This new area can help you kickstart those tests with as little friction as possible. It allows you to easily register your device or browser as a test device that will highlight if crucial features are implemented, data is collected as it should, and, of course, if messages are delivered accordingly. More specifically, it allows you to easily create as many messages as needed and test if all the built-in features we offer work as expected.
Selecting a Test Device
It all starts with a test device. Assuming you have the app installed or visited the website before, that you've accepted push notifications, allowed location updates or any other features you've implemented, you are now ready to select that device as a test device.
If you are using our SDK 2.6 or higher and your developer followed the steps described here and here, you can then use our frictionless scanning mechanism to register your device as a test device. You can perform these tests for mobile apps or websites, so the very first thing you need to do is to select which platform you are going to test:
If you are testing a mobile app, selecting that option will straight away present you a QR Code:
Most modern devices come with QR Code scanning apps (for example, the built-in camera app in iOS or Samsung devices can scan these codes) but if your device cannot, any free QR Code scanning app will probably do the job.
If instead you are testing a website, you will also need to select in which domain you will perform these tests:
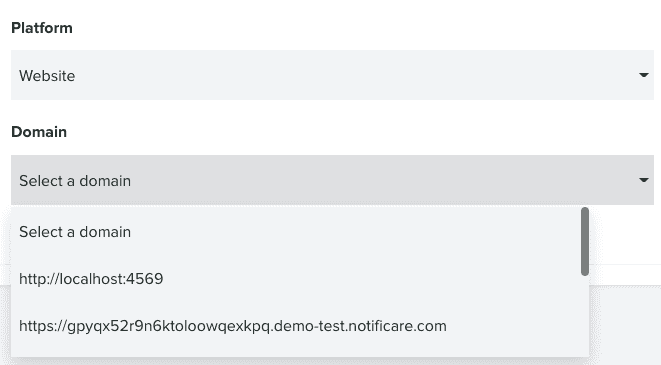
After selecting a domain, you will then see a QR Code that you can scan (if you're testing a website in an Android device) or a link that you can follow (if you are testing it in a desktop):
For both platforms, as soon as the application or website opens after scanning, you will see that our dashboard will automatically select your device:
Reviewing Features
It is now time to review if all the features, that matter to you, are implemented correctly and collecting the data you expect. You can then annotate the results of your tests and add any remarks you want. For example, if your device is registered and displays correctly you can then click the grey circle on the right to bring up the following modal window, where you can define the result for that feature:
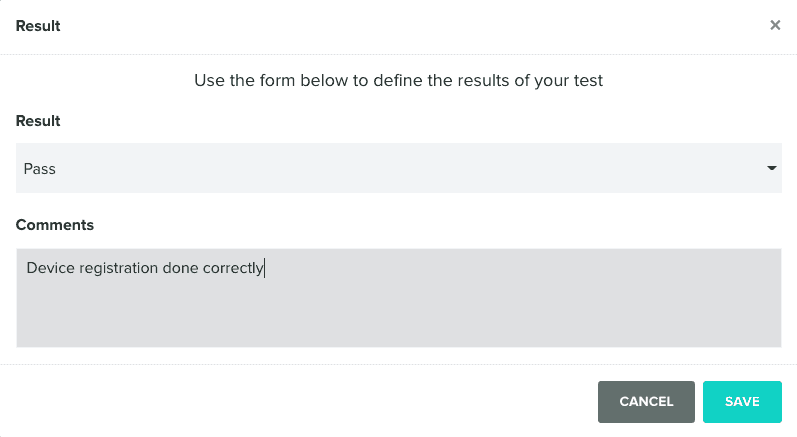
You can select the following options: To Do, Pass, Fail, Partial and Unknown. And, of course, you can also add any remarks you want (if applicable). These will be stored and can be used to point out problems or praise a successful test.
You can then repeat this same process for all the other features available in your app or website. For example, if your app has some form of authentication and the app assigns a device to an authenticated user, you can confirm if it correctly registers them in the following area:
Pretty much the same way, you can confirm if Tags are correctly registered:
If User Data Fields are present:
If Do Not Disturb values are defined correctly:
And if Location Services are working and collecting data as expected:
Finally, you will also be able to test all the types of notifications you can send with our platform. This section will allow you to speed up how messages are composed without necessarily having to prepare any content. You start by clicking the + button on the right:
This opens a modal window as follows:
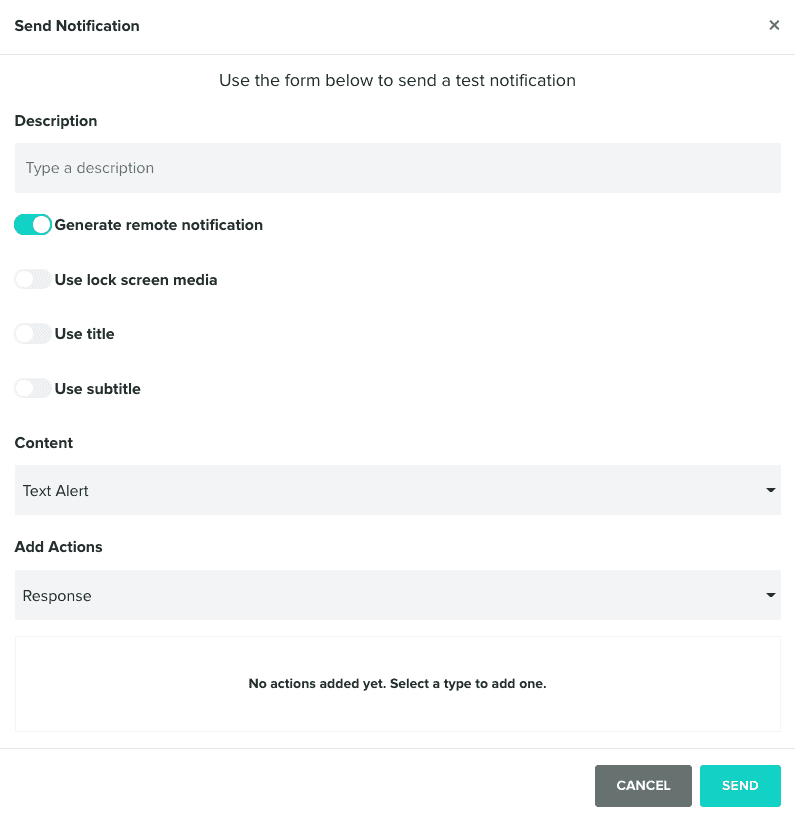
You can then define a name for the test and select all the options you want to include in the message. Once you are done selecting these options, clicking Send will effectively send a notification to your device:
If a message arrives and opening it works as expected (including if content is displayed and metrics are collected as expected), you can also annotate the result of each individual message as shown before.
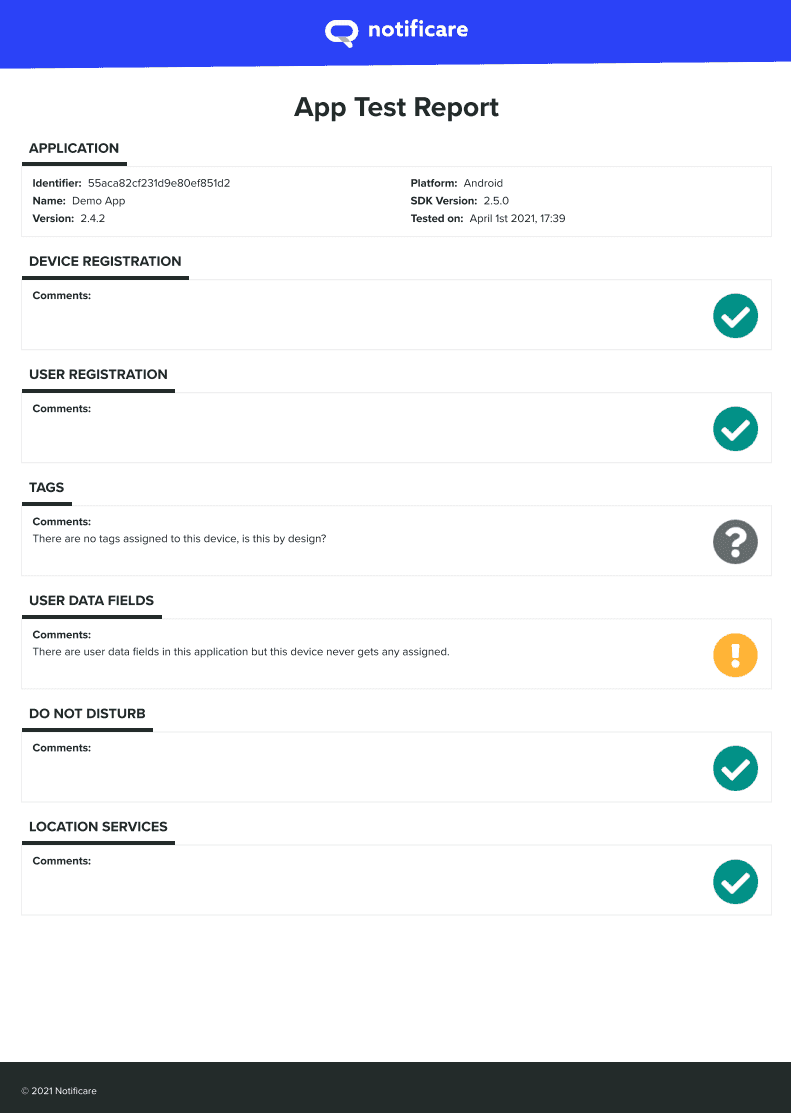
In the end, you can store all these results in a comprehensive test report that you can revisit at any time or even download as a PDF:
Ready for better tests?
As you can see, this functionality can reduce the amount of time needed to perform a Notificare integration test in your application or website. It can help spot problems faster and help prevent shipping apps or websites with show-stopping problems. It can be used to store a historical written record of tests performed and it is a great way of sharing your findings with clients, team members or supervisors.
As always, we are available for any question you might have via our Support Channel and if you want to see this in action, you can always request a demo from our Sales team.
